Play Rock Guitar 6: Soloing Principles

Energize Your Rock Guitar Solos with this Rock Learning Path Core Course

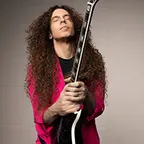
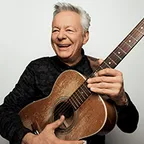
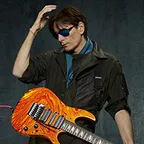
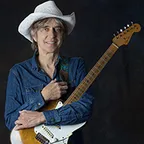
Marty FriedmanTommy EmmanuelSteve VaiEric GalesEric Johnson

Get this course and 1,000+ more with All Access

Try 14 days free. Cancel any time.

Purchase Individual Course for $5.00
Play Rock Guitar 6: Soloing Principles

About this course

Welcome to Play Rock Guitar 6: Soloing Principles for intermediate to late Intermediate students of Rock guitar.

This Rock Learning Path core course is presented by 9 top TrueFire educators: Andy Timmons, Dave Celentano, Jeff Scheetz, Angus Clark, Jeff McErlain, Massimo Varini, Brad Carlton, Andy Aledort and Robbie Calvo.

The Soloing Principles curriculum is comprised of select Rock guitar lessons from the educators’ existing TrueFire course libraries.

Solid rhythm chops may get you the gig but it's your soloing chops that gets you the spotlight and the opportunity to electrify the audience with your musicality. Creativity, technique, and vocabulary are the essential skills you’ll need to master the art of improvisation and develop into a great soloist. The video guitar lessons in this core course will equip you with the requisite tools and guidance to take your soloing skills to the next level.

Play Rock Guitar 6: Soloing Principles is organized into 2 sections. In the first section, you’ll work on learning new techniques for building a solo. In Section 2 you’ll dissect solos across a variety of Rock feels.

When you’ve completed the lessons here in Soloing Principles, you’ll find more lessons focused on soloing in Soloing Approaches, also a Play Rock Guitar 6 core course.

The educators demonstrate all of the key examples over jam tracks (where and when applicable) to simulate a real-world application, in a musical context. All of the key examples are also tabbed and notated for your practice, reference and study purposes.

You’ll also get Guitar Pro files so that you can play, loop or slow down the tab and notation as you work through the lessons. Plus, you’ll have all of the available jam tracks to work with on your own.

Take as much time as you need to work through each video guitar lesson before moving on to the next lesson. If you want to dig deeper or wider into any of the topics covered in this core course, check out the recommended supplementary courses in your learning path where you’ll find more examples, techniques and insight from top TrueFire educators.

Grab your guitar and let’s get started!

What you'll learn

  • Learn to target chord tones during improvisation
  • Advanced soloing techniques
  • Improvisation skills
  • Develop harmonic awareness while soloing
  • Develop strategic approach to guitar soloing
Release date: 09/14/2016 • 2h 33m runtime
Start Course
Sample lessons
Rock Style Soloing
Rock Style Soloing
Principle 44
Tension and Release
Tension and Release
Concept 3
Whammy Bar
Whammy Bar
Breakdown
Whammy Bar
Whammy Bar
Performance

What's included

42 lessons • 21 charts • 19 Jam Tracks

Play Rock Guitar 6: Soloing Principles
Welcome to Play Rock Guitar 6: Soloing Principles for intermediate to late Intermediate students of Rock guitar.

This Rock Learning Path core course is presented by 9 top TrueFire educators: Andy Timmons, Dave Celentano, Jeff Scheetz, Angus Clark, Jeff McErlain, Massimo Varini, Brad Carlton, Andy Aledort and Robbie Calvo.

The Soloing Principles curriculum is comprised of select Rock guitar lessons from the educators' existing TrueFire course libraries.

Solid rhythm chops may get you the gig but it's your soloing chops that gets you the spotlight and the opportunity to electrify the audience with your musicality. Creativity, technique, and vocabulary are the essential skills you'll need to master the art of improvisation and develop into a great soloist. The video guitar lessons in this core course will equip you with the requisite tools and guidance to take your soloing skills to the next level.

Play Rock Guitar 6: Soloing Principles is organized into 2 sections. In the first section, you'll work on learning new techniques for building a solo. In Section 2 you'll dissect solos across a variety of Rock feels.

When you've completed the lessons here in Soloing Principles, you'll find more lessons focused on soloing in Soloing Approaches, also a Play Rock Guitar 6 core course.

The educators demonstrate all of the key examples over jam tracks (where and when applicable) to simulate a real-world application, in a musical context. All of the key examples are also tabbed and notated for your practice, reference and study purposes.

You'll also get Guitar Pro files so that you can play, loop or slow down the tab and notation as you work through the lessons. Plus, you'll have all of the available jam tracks to work with on your own.

Take as much time as you need to work through each video guitar lesson before moving on to the next lesson. If you want to dig deeper or wider into any of the topics covered in this core course, check out the recommended supplementary courses in your learning path where you'll find more examples, techniques and insight from top TrueFire educators.

Grab your guitar and let's get started!
Essential Techniques
In this section you will learn how to craft a solo by using phrasing, focusing on the 3rd, and using tension and release.

TIP! Soloing is more than just licks. You need to understand the correlation between phrasing, melody and harmony. Becoming a good soloist is as much if not more mental than physical.

When you are working on various soloing concepts, ask yourself questions like - What chords will this approach work over? What groove or feel does this solo fit best over? What is the best note choice for this part? How can I get from here to there in the solo? Are there other scale options? Does my solo have a beginning, a middle and an end? - Or am I just rambling on.

Asking yourself these questions as you are beginning to build up your soloing chops will help make sure you are really thinking about what you are playing and working on. If you put in the time on this now, it will eventually lead you to the ultimate place for soloists where you won't have to think about any of it at all - you just play!
Crafting a Solo
Crafting a Solo - Principle 41 is a video guitar lesson presented by Robbie Calvo and is sourced from Guitar Interactives.

PRINCIPLE 41 - CRAFTING A SOLO

We can learn to craft our solo's and melodic lines by considering how we pace our phrases, use dynamics and bring our solo's to a crescendo. In other words, we can structure our solo's to have a beginning, middle and end.

I like to start a solo with strong chord tone motifs that are very simple. I like sustained notes that have lots of space around them too. This introduces the ‘solo' to the listener without bombarding them with a flurry of notes. I build the melodic phrases from there developing the ideas and gradually increasing the note values from whole notes, half notes, through quarters, eighths and sixteenths.

Listening to the underlying harmony and groove is going to be key to developing your solo's. The music often dictates where the open phrases should sit and where the faster more fluid lines would best be served.

Another key element is working within the framework of measures that we are given to express our solo. Typical solo lengths are 4 or 8 bars. Pop solo's may only be 1 or 2 bars in length if at all, so we have to become very good at expressing ourselves within a short period of time.

I'm not a huge fan or advocate of the never ending backing track that we often get to jam over. This is not a good way to learn how to structure and develop solo's, in fact I think it detracts from the focus of making concise musical statements.

Now it's your turn to explore the options on how to develop well crafted solo lines.

Phrasing
Phrasing - Principle 37 is a video guitar lesson presented by Robbie Calvo and is sourced from Guitar Interactives.

PRINCIPLE 37 - PHRASING

What is phrasing? Phrasing to me, is how you deliver your melodic message through a series of rhythmic statements. I like to think of phrasing as a musical conversation between two people. A question may be posed to the listener and the listener responds with an answer. This approach is called ‘Question and Answer' or ‘Call and Response'.

Rhythm and Blues music is a great platform for this type of phrasing and is a simple way to work on enhancing your phrasing vocabulary.

Another great way to create simple melodic conversations is to sing the ideas first and then find them on your guitar. This is also a fabulous way of adding new phrases to your lick library.

Rock Style Soloing
Rock Style Soloing - Principle 44 is a video guitar lesson presented by Robbie Calvo and is sourced from Guitar Interactives.

PRINCIPLE 44 - ROCK STYLE SOLO'S

With the diversity of rock music being what it is these days how do we define what rock lead guitar soloing is all about? Well, it would be subjective at best but we can look at some typical approaches, scales, arpeggios and techniques used by the modern rock guitarist.

I've put together a classic rock progression that will allow us to play modally using a variety of scales and arpeggio's including the major / minor pentatonic scales, the blues scale, major scale and even the harmonic minor scale.

Let's check that out!

Focusing On The Third
Focusing On The Third - Concept 1 is a video guitar lesson presented by Andy Timmons and is sourced from Electric Expression.

We're going to take my song "Electric Gypsy" and use it as a vehicle to illustrate some of the ways that I think about songwriting and soloing. It contains several ideas that might be helpful to you in your own songwriting and your own melodic choice. I'm going to play the actual basic riff of the song and then talk a bit about some of the parts that it contains. The song is in the key of D major. So it's a melody contained in chordal work, which is something I love and something a lot of us were inspired by Jimi Hendrix. In fact, that's the inspiration of the title of that song. It was from a biography I was reading called "Electric Gypsy". I snagged it right from that, full disclosure folks. What's interesting about this melody is that it is largely based on the third of the chord. So if you just learn how to spell each chord, the first chord is D major, which contains the notes D, F#, and A. The F# being the third of that chord. So I've got an open string D and I played the melody on the G string. The F# is the important note of the chord that defines whether it's major or minor and to me that's the sweet note. The root is the tonic, very stable note, but not the most flavor, as well as the fifth, the A. The third gives you that flavor of major or minor. If it were D, that'd be a very sad song, not the same vibe, so we've got the F#. The next chord is A major, we've got A, C#, and E. That C# figures in largely to that melody. The next chord is B minor so I voice lead. You can see it in that B minor chord shape that you already probably know. I use the old Jimi Hendrix wrap around the neck to thumb, that low B note. The next chord is G major so it's just those four chords, D major, A major, B minor, to G major. This doesn't really contain the third, but it's just a nice little bluesy riff. But there it is, it contains some very important nuggets. From songwriting, my natural melodic ear wants to hear the third of that chord at some point in the bar that it's happening. There's a D major chord going on, if I'm writing a song. It's likely to be featured, or if I'm soloing that's the note that most defines to me and the listener what the harmony is, and it seems that all the players that I gravitated to were guys that really had a command of this.

Guys like Robben Ford, Larry Carlton, and Steve Lukather. But even before them, guys like Wes Montgomery, Pat Metheny, and Pat Martino. They were very adept. If there was no other instrumentation going on, just by listening to their lines, you would hear that harmony outline in some shape or form, and a lot of that's based on the third. Thinking of it in an improvisational way, you can utilize that idea by isolating the third of each chord. Sometimes it's easy to do that by visualizing the actual chord shape. I've come to realize after all these years how much I am guided by my ear and my eye too, because I can see in the chord shape, I know where that third is. There's the F#, so if I want to feature that over that chord and play it into the A major, there's the C#. That's the third B, D, F#, and G major. It's there if you're more familiar with that chord shape. You can make a little exercise out of that. As the chords go by you will hear the harmony go by, into a higher B for the third of that G chord. I'm going to improvise a little bit now, basically staying in a D major pentatonic, but also utilizing the thirds of those chords as they go by. See if you can hear the harmony as I'm improvising. I was utilizing some of that pentatonic that we all know. Looks like the same pentatonic as B minor, because that's the relative minor of D major and then adding those chord tones. Actually a very good exercise to just play the chords for a while. It's a great idea to work on rhythm playing, because it does help you visualize where some of these chord tones are, in addition to where your most basic scales would be formed around. So when I'm playing major pentatonic, I see that part of that triad as the basis - like the home. If you learned different chord shapes, of course there's probably the first D major you learned to A major to B minor or good old G major. This is playing the octave of where you were. That's like that D major form for the A. So many possibilities just being aware of the chords and how to spell a simple triad within those chords and voice leading with some of the thirds.

Eliminating Blind Spots
Eliminating Blind Spots - Concept 2 is a video guitar lesson presented by Andy Timmons and is sourced from Electric Expression.

We're going to take my tune "Cry For You" and use it to show you just a few ideas that might help you expand on some of the things you already know and some pretty simple ideas that I think will lead you to some nice melodic ideas. Let me first talk about the chord structure of the basic melody, very simple. It's D minor, I guess D minor 7 if you look at the original riff, but you can consider it D minor, and then down to B flat for the major 7. So essentially D minor to B flat. As always, I will pare things down to the most simplest form. One idea might work over all the chords in this particular sequence and of course the D minor pentatonic is a go-to fan favorite of most guitarists. As I talked about previously, so many of these things are based on chord shapes that you already know, so I think the first couple of D minors that come to mind for most guitar players are the ones based with the root on the A string, or of course the tenth fret with the tonic on the low E string. There's the two D minors that I would base it off of, or maybe the open position as well. So I'm going to start with a D minor pentatonic and that's one basic position you may know, or I think this initial box position is what we all started with. With just those two positions and just the one scale there's a lifetime of music to make right there. You don't need to know anything else. It's an oversimplification, but it's really true. There's so much that can be done with just those five notes. It's just a matter of how they're played and what notes are played at what time. But obviously we like having a bit more to be able to do to help expand our melodic possibilities and what I like to do is blend those two positions together, and that's what I'm hoping to underscore here, is how to connect a couple of positions you already know and eliminate what I used to call blind spots. Before I really learned a lot about the guitar neck there was always a couple of positions I was most comfortable playing in. So the epiphany moment was when I realized how they just all connected together, and I didn't have to stay in a box. I could think more horizontally and so that's what I want to encourage you to work on in this particular segment, connecting those two positions, you can find ways of doing that. One of the things I like to do is to play things on one string and learn things that way. That way, you can play the pentatonic in the position and that's something that I grew to do a lot in a lot of my playing. I started gravitating towards that being a more vocal sound and if you're familiar with my music at all you'll realize that there's a lot of slippin' and slidin' and a lot of horizontal playing going on. There's nothing wrong with hearing but somehow this moves me a bit more. It's got a little bit more emotional content, more like a singer.

So try it on the A string and then visualize where that next chord is so you already start to see that you know that. I love that sound and you can try that on each string. If we reach out to the F and then play the D minor pentatonic on that D string you can use the open D string. Here I am at that open position D minor just up the octave. Of course I'm going to want to do it on every string. So go back to that chord position and a quick word about fingering. I'll do sliding generally with the first or third finger, but you have to figure out what's most comfortable for you. I'm never one to suggest that there's only one way you have to do it. Sometimes as an exercise I'll give the one finger exercise. Sometimes it's easier for players to visualize in that way. I might start out with the first finger and then go to the third finger, because I'll bend a lot into notes as well. I'll talk more about bending later. Why not on the B string as well? Start on that note F, you recognize that as the third from that D minor chord. You're already up to this position, just an octave from where we started the come-together bend. Now if you were only well-versed in those two positions and now you've really branched out over the whole guitar neck, and it's pretty easy that way. My epiphany was with Ted Nugent's "Strangle Hold", because I had the two positions in A minor pentatonic, and there was the bridge. There was that little epiphany that I can connect these two positions. Had I been a great practicer at that time I would've done it on all strings, but that was enough for a kid in his bedroom playing with his KISS and Ted Nugent records. So let's take the D minor on the E string, on the high E string. So I was descending on one string and then changing. Hopefully that will give you a little bit of inspiration to get rid of those blind spots. It's fun to be able to effortlessly blend those positions you already know, and then get into some of those phrasings where you're using more of a horizontal line. It's nice to slide from one note in the scale to an upper note.

+ 35 more lessons

Start Course

Reviews

4 results

magditfr

Verified buyer

10/20/22

Star instructor line-up

I was looking for tips and ideas on how to improve my Lead work. This compilation fits the bill. The instructor line-up is impressive, e.g. Andy Aledort, Robbie Calvo, and Brad Carlton being three of my favorites. All combined, they provide multiple styles. You will be challenged and certainly not bored with this course!

solinski

Verified buyer

03/20/21

Great course

This course builds on fundamentals taught in an earlier course in this series. More concepts and techniques are explained, allowing you to progress in your knowledge and skills. With explanations and examples coming from the likes of Angus Clark, Dave Celentano and Andy Timmons among other great instructors, you can't go wrong.

wholmer

12/23/20

Way to get started!

Learning to solo is like learning to talk. Baby steps are needed to begin with (as in everything you try to do) and this is the way to start. Getting these short little words and sentences added to your vocabulary will get you moving on to being able to express yourself.

javierON01

Verified buyer

10/14/20

The best on the internet to learn guitar

Stop searching. Start improving with All Access.

Try 14 days free. Cancel any time.