Take 5: Travis Picking

Accelerated Technique-Specific Study Program for Travis Picking on Guitar

Marty FriedmanTommy EmmanuelSteve VaiEric GalesEric Johnson

Get this course and 1,000+ more with All Access

Try 14 days free. Cancel any time.

Purchase Individual Course for $14.99
Take 5: Travis Picking

About this course

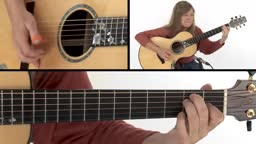
This Travis Picking edition of Take 5 from Muriel Anderson is an accelerated curriculum designed to help get your Travis Picking technique up and running quickly without having to struggle through a lot of tedious exercises and boring etudes. Work through the course and you’ll have a basic but solid Travis Picking technique under your belt and five Travis Picking pieces in your repertoire!

”For me, learning guitar as a kid was a fun, natural, and very gradual process. But the thing that really grabbed me was Travis picking. I had learned to change chords and strum and sing along folk songs with other people, and occasional bass runs and arpeggios, but when my teacher came in with this Travis tune that was it! How cool was it to keep a bass going and play the melody at the same time!

But it wasn't until I was an adult many years later that I actually heard the music of Merle Travis after whom the style was named, and I realized that what he was doing was really quite different from the Travis picking I learned as a kid. So, what I'd like to do is give you an intro to Travis-style picking and also work in some of those cool little details, some of the things that he was doing to give it that Muhlenberg County authentic sound”


You’ll start the course with a quick primer during which Muriel will give you seven lessons that you can do to achieve a more genuine Travis picking technique: Muting the bass and "choking the strings” as Travis called it, Using the Thumbpick, Bracing the Pinky, Moving the Thumb in Little Circles, Hitting More Than One String on Beats 2 & 4, Bass Notes, Use of the Thumb on the Neck to Fret Notes and Play Bass Runs, Two Fingers are Enough, Syncopation, and Good Solid Beat.

Muriel will then guide you through 5 Travis Picking performance studies, progressing from basic to more advanced applications of the technique.

Muriel will explain and demonstrate all of the key concepts and approaches along the way.  You’ll get standard notation and tabs for all of the Performance Studies. In addition, you’ll be able to loop or slow down any of the videos so that you can work with the lessons at your own pace.

Grab your guitar and let’s “choke some strings” with Muriel Anderson!


About the Take 5 Series

TrueFire’s Take 5 courses feature an accelerated curricular approach to help students get up to speed quickly on a particular style or technique. Each Take 5 course starts with a primer on the particular style or technique and then guides the student through 5 performance studies progressing from basic applications to more sophisticated approaches.

What you'll learn

  • Understand the difference between authentic Travis picking and common interpretations
  • Learn seven techniques for achieving genuine Travis picking sound
  • Progress through five performance studies from basic to advanced
  • Develop solid feel and groove characteristic of Travis style
  • Build foundation for developing personal Travis-influenced style
Release date: 08/13/2018 • 0h 59m runtime
Start Course
Sample lessons
Level 5: Travis Picking
Overview
Level 5: Travis Picking
Performance
Level 5: Travis Picking
Breakdown

What's included

19 lessons • 5 charts

Take 5: Travis Picking
Hi, I'm Muriel Anderson. Welcome to this Travis Picking edition of Take 5.

What made me really fall in love with playing the guitar, from the very beginning, is Travis picking. But, what a lot of people call Travis Picking isn't really the way Merle Travis played.

I'm happy to share with you what I've learned over time — how to get more of that authentic Muhlenberg county sound.

I'll start by showing you 7 things that you can do to achieve a more genuine Travis picking technique.

I'll then guide you through 5 performance studies, from basic to more advanced, giving you a solid foundation in Travis picking.

All of the performance studies are tabbed and notated. You can loop and slow down the videos to work at your own pace.

Grab your guitar and let's get Travis picking!
Travis Picking Primer
For me, learning guitar as a kid was a fun, natural, and very gradual process. But the thing that really grabbed me was Travis picking. I had learned to change chords and strum and sing along folk songs with other people, and occasional bass runs and arpeggios, but when my teacher came in with this Travis tune that was it! How cool was it to keep a bass going and play the melody at the same time! But it wasn't until I was an adult many years later that I actually heard the music of Merle Travis after whom the style was named, and I realized that what he was doing was really quite different from the Travis picking I learned as a kid. So, what I'd like to do is give you an intro to Travis-style picking and also work in some of those cool little details, some of the things that he was doing to give it that Muhlenberg County authentic sound.

Muting the bass — what Travis called "choking the strings".
Lightly lay the side of your palm across the bottom strings (usually the bottom 3, occasionally the 4th as well) so they sound muffled while the melody notes ring free. Experiment with where you place your hand to get just the right amount of muffle. Too close to the sound hole and the strings will be completely muted, too close to the bridge and they'll ring out too much. Find that spot where you like the sound and you're getting just the amount of muffle you need.

Thumbpick
The thumbpick gives more volume and attack to your bass notes and its traditional to use one in this style. Make sure you get one that fits your thumb snugly, so it won't move around while you're playing. I sand mine with several grades of fine sandpaper or cloth nail file just like I would my fingernails to get a smooth edge.

You can also play with your bare thumb. Because of your hand position, you'll be using the side corner of your thumb instead of the nail.

Lightly Bracing the Pinky on the Face of the Guitar
Normally I don't recommend this because it makes your hand tense. I started out bracing my pinky and it took me a while to "unlearn" it, so I could have a nice relaxed feel over the sound hole. But when you're playing with a muffled bass, your hand is in a position where it doesn't cramp up your hand, so if it helps you to have more stability, go for it!

Move the Thumb in Little Circles
This movement makes switching between the bass notes smooth and helps you to keep the all-important beat.

On Beats 2 & 4, Hit More Than One String on the Bass
I first learned fingerpicking with all separate, clean bass notes, like Chet Atkins, but Travis just made a swipe to hit two or three strings at a time instead of just the 4th string in beats 2 and 4 to approximate the bass chord as played by the left hand of a stride piano player.

Bass Notes
I first learned to always play my bass notes starting on the roots of the chords and play an alternating bass, but much of the time Travis just kept playing the 6th string. Also, instead of the root (1) he also often played the 3rd or the 5th of the chord in the bass. This gives the music a unique sound.

Use of the Thumb on the Neck to Fret Notes and Play Bass Runs
Travis fingered many of his bass notes with his left hand thumb around the back of the neck and even did bass runs with it. He had big hands and a skinny neck guitar. I have small hands with a fat neck guitar, so I don't do it as much, but if you can, go for it! I worked a long time on barre chords but with that thumb around the top, but Travis almost never made a full barre chord, he just used his thumb around the back of the neck.

Two Fingers are Enough
I learned to play using four fingers, with my right-hand thumb covering the bass notes and my index, middle, and ring covering strings 3, 2, and 1, but Travis played all his melodies with just his index finger. Either way is fine.

Syncopation
There's a lot of syncopation; playing the melody notes in between the bass notes, anticipating notes. That's really important to this style. I'll be giving you exercises to work on that.

Good Solid Beat
Last but not least, really lay into that beat. Some of these exercises may seem really easy and you'll want to play them fast. But it's harder to play it slowly and get that really solid feel going. It helps to play along with other people and just do that accompaniment for a while. Chet Atkins said half-jokingly that all he did for his first two years playing was go back and forth between two bass notes! Just do it for a while. Don't add any fancy stuff until you've got a good solid feel going.

Level 1: Travis Picking
Let's start with just an accompaniment part using the thumb only. We'll use "I Am a Pilgrim," a traditional song that Merle Travis played a lot. It's a great one to start with because it uses a lot of the typical chord positions that he used in the key of E.

We'll do the A chord three different ways:
  • The first time we'll do a regular A7 at the second fret but keeping the low E in the bass. You'll want to instinctively go to the fifth string but here we're going to hang on that sixth string.
  • The second time we'll grab an A chord on the top four strings in fifth position.
  • The third time we'll just do a straight barre on the regular 2nd fret A chord.
Level 1: Travis Picking
Let's start with just an accompaniment part using the thumb only. We'll use "I Am a Pilgrim," a traditional song that Merle Travis played a lot. It's a great one to start with because it uses a lot of the typical chord positions that he used in the key of E.

We'll do the A chord three different ways:
  • The first time we'll do a regular A7 at the second fret but keeping the low E in the bass. You'll want to instinctively go to the fifth string but here we're going to hang on that sixth string.
  • The second time we'll grab an A chord on the top four strings in fifth position.
  • The third time we'll just do a straight barre on the regular 2nd fret A chord.
Level 1: Travis Picking
Even though this is just an accompaniment using only the thumb, it's harder than it may seem.

The first thing is to keep that nice solid feel going throughout. We're playing the bass mostly on the 6th string, alternating with a swipe of strings 4, 3 & 2.

The form of the song is 16 bars, like this:

| B7 | B7 | E | E | A7 | A7 | E | E |

| E | E | A | A | E | B7 | E A | E |

It starts with two bars of a regular B7 chord, but with the lowest note on the F# on the 2nd fret low E string instead of on the B on the 2nd fret A string, so we're starting right away with a note in the bass that isn't the root. You can grab that F# with your thumb if your hands are big enough or with your 2nd finger (like I do).

Bars 3 & 4 use just a regular E chord, and bars 5 & 6 use a regular A7 but still with the 6th string in the bass. Then go back to E.

Once you get comfortable playing the first 8 bars with a good solid feel, add in a little bass run between the E chords at the end of the 8th bar and the beginning of the 9th bar using the G and F# notes from the third to the second fret on the 6th string. You can use your thumb for this like Travis did.

For the A chord in bars 11 & 12, make an F shape at the 5th fret. Here we'll play the bass on the A string for a different sound.

For the E chord in Bar 13, you're just playing a bass run: the low E note twice, then the G# at the 6th string fourth fret twice, then walk up chromatically from the open A on the fifth string, A# on the first fret to the B note on the second fret.

For the B7 in Bar 14, we have the B note on the 2nd fret A string in the bass on Beat 1 and the F# note on the 6th string 2nd fret on Beat 3.

For that last A chord in Bar 15, just play a regular A chord with the open A in the bass. I like to do it with my index finger barring strings 4 and 3, or 4, 3, & 2, but if you have a fingering that's more comfortable for you, go ahead and use that.

Notice that I'm squeezing the strings and then releasing them while keeping my fingers on the chord (in other words, I'm not lifting my fingers completely off the strings, just releasing the tension to muffle the chords). There's no reason to keep all that tension in your left hand. So, I'm actually muting with both hands and that gives it a cool sound and is easier on my left hand as well.

Once you get it down, try singing along with it!
Level 2: Travis Picking
In this next version of "I Am a Pilgrim", we're going to add in some of those melody notes (not all of them). We'll work in that index finger and also add a syncopated feel. So instead of everything on the beat, we'll be playing notes in between the beats as well. Adding melody notes while keeping the bass going — that's what Travis picking is all about!
Level 2: Travis Picking
In this next version of "I Am a Pilgrim", we're going to add in some of those melody notes (not all of them). We'll work in that index finger and also add a syncopated feel. So instead of everything on the beat, we'll be playing notes in between the beats as well. Adding melody notes while keeping the bass going — that's what Travis picking is all about!

+ 12 more lessons

Start Course

Reviews

9 results

Karalea

06/28/22

Take 5: Travis Picking

This course is great. I really enjoyed it. I think its perfect for people who are just getting into fingerstyle. The lessons were really well explained and easy to understand. I love that I could play a classic Travis picking tune by the end of the course. I would definitely recommend it to anyone interested in this style of guitar playing.

Dave58

Verified buyer

04/18/22

well done

Interesting walk-in course to grow in this fascinating country fingerstyle. Very clearly explained by this fingerpicking virtuoso. It is a fun package to learn and very instructive.

jotka53

Verified buyer

11/21/21

Take 5: Travis Picking

Great stuff

tomac

Verified buyer

11/12/21

Great

Ktkoba

Verified buyer

05/30/21

An excellent video to learn how to get the Travis Style from the ground up.

Stop searching. Start improving with All Access.

Try 14 days free. Cancel any time.