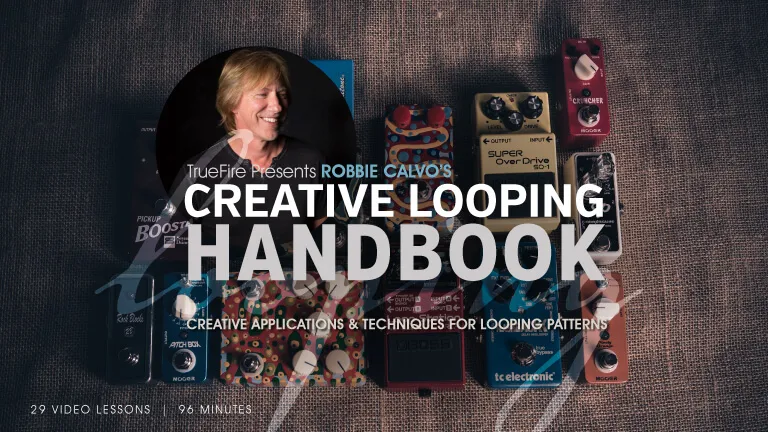
Creative Looping Handbook

Creative Applications & Techniques for Looping Patterns

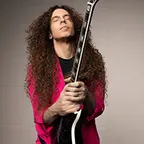
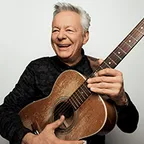
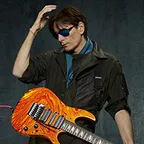
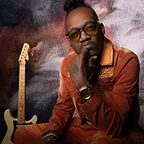
Marty FriedmanTommy EmmanuelSteve VaiEric GalesEric Johnson

Get this course and 1,000+ more with All Access

Try 14 days free. Cancel any time.
Purchase Individual Course for $14.99
Creative Looping Handbook

About this course

The looper pedal can be used for so many practical applications. It's an ideal learning tool for creating practice backing tracks at any tempo and in any key. You can also use a looper to set up grooves for jamming with friends and work on your soloing and improvisational skills.

Many musicians also use the looper to try out pre-production ideas before a studio session or for orchestrating band parts. Artists use the loop pedal live in performance on stage because they can record, overdub, and improvise on the fly or produce backing tracks for a solo gig.

Robbie Calvo's Creative Looping Handbook is a hands-on, practical guide to help you get up to speed quickly so that you can make the most out of your practice time, jam sessions, pre-production arrangements and live performances using a loop recorder pedal.

"I'll get you up and playing fast with a complete understanding of the loop pedal switch functions and volume settings, and I'll also show you how to set-up your signal chain to get the best sonic results. I'll give you tips on how to plan your arrangements, and most importantly, show you how to precisely time your recording execution for seamless playback."

Robbie organized the Creative Looping Handbook into two sections. In the first section, Robbie presents a Looping Primer. "I'll take you through the various aspects of looping and we'll discuss the types of pedals available, the signal chain, pedal functions, with an overview and definition of what "phrase looping" is. I'll also show you how to create a timing guide if you're using a looper pedal without any pre-recorded grooves. This will help you get up and running fast with a solid base for future loop recording."

In the second section, Robbie guides you through a series of tutorials, demonstrations and breakdowns designed to get you up and running easily, quick key and very creatively! You'll start with simple loops and work your way up to more complex performance applications: Creating A Simple Practice Loop, Count-Ins & Rhythm Grooves, Creating A Loop With Auto Start, Creating 2 Bar Loops, Creating 4 Bar Loops, Creating Complex Arrangements, Looping Live: With A Band, and Gear Talk.

"We'll explore a variety of creative applications to get your looping technique up to speed. For each, I'll start off by explaining the approach, the parts we'll be using, and then I'll perform a demonstration for you of all of the elements we've discussed, and then break it all down for you"

All of the key demonstrations and performances are tabbed and notated for your practice, reference and study purposes. You'll also get Guitar Pro files so that you can play, loop and/or slow down the tab and notation as you work through the lessons. Plus, Robbie generously includes all of the rhythm tracks for you to work with on your own.

Grab your guitar and let's get looping with Robbie Calvo!

Recommended Loop Pedal: Boss RC-3

boss rc-3 loop pedalThe Boss RC-3 is powerfully equipped yet conveniently housed in a compact pedal. Enjoy up to three hours of stereo recording time, storage for 99 loops, a “real drums” rhythm guide, and USB 2.0 compatibility all in a small BOSS stompbox.

The Boss RC-3 provides three hours of stereo recording capacity direct to internal memory. Now you can record long phrases without worrying about memory. 99 memory locations let you save as many phrases or ideas as you can create. Guitarists who want to incorporate external stereo effects devices will appreciate the true stereo I/O on the Boss RC-3.

The Auto Recording feature starts recording the moment you begin playing your guitar, or as soon as you start a connected audio player. Count-In mode gives you one-bar of rhythm before recording starts. You can Undo/Redo as you go. The sky’s the limit with three hours of recording time!

To keep your loops tight and in time, you can play along with one of the basic rhythm patterns in the Boss RC-3’s onboard library as you record. Ten types of rhythm types are provided, including Rock, Pop, Funk, Shuffle, R&B, and Latin. A dedicated knob lets you adjust the volume of the rhythm, and you can set the tempo via tap tempo. You can also specify the time signature. When you save a phrase, the rhythm type and time signature will also be saved.

You can connect the Boss RC-3 to your computer via a standard USB cable, and back up your Boss RC-3 recordings to your computer for safekeeping. You can also load WAV files from your computer directly into the Boss RC-3. The RC-3 accepts 16-bit/44.1kHz WAV files of up to 1.7GB in size.

In addition to recording your guitar or bass performances and turning them into playable loops, you can also record other external stereo audio sources via the Boss RC-3’s AUX IN. Sound from a digital-audio player connected to the AUX input, for example, can easily be recorded and made into a loop.

Buy the Boss RC-3 now at Amazon
Start Course
Sample lessons
What Is Phrase Looping?
Overview
Loop Pedal Functions
Overview
Creating A Simple Practice Loop
Overview
Creating A Simple Practice Loop
Performance

What's included

29 lessons • 9 charts • 1 Jam Tracks

The Creative Looping Handbook

The Creative Looping Handbook is a practical guide to help you get the most out of your practice time, jam sessions, pre-production arrangements and live performances using a loop recorder pedal.

The looper pedal gives us a great way to remotely record our ideas without a microphone or computer. We can create backing tracks in any key and tempo for practice time, jam sessions, arranging overdubs and even playing live with or without a band.

The loop recorder is one of the most affordable and powerful tools we can use as a guitarist, as they're easy to integrate into any pedalboard set-up and come in a range of footprint sizes and feature options. Recording quality is of a very high standard and comes in mono or stereo formats.

I'll get you up and playing fast with a complete understanding of the loop pedal switch functions and volume settings, and I'll also show you how to set-up your signal chain to get the best sonic results. I'll give you tips on how to plan your arrangements, and most importantly, show you how to precisely time your recording execution for seamless playback.

In addition, I've prepared three main practical performance sections for a little inspiration:

  • Looping for practice/jam sessions
  • Looping for pre-production layering and arranging of parts.
  • Looping for live performance.

All of my performances will be tabbed and notated, plus you'll get audio tracks for jamming over with some performance and scale tips as an added bonus.

SECTION 1: Looping Primer

In Section 1, I'll be taking you through the various aspects of looping. I'll talk about the types of pedals available, the signal chain, pedal functions, and give an overview and definition of what "phrase looping" is.

I'll also show you how to create a timing guide if you’re using a looper pedal without any pre-recorded grooves. This will help you get up and running fast with a solid base for future loop recording.

What Is Phrase Looping?

What is phrase looping?

Well, phrase looping is the recording of your musical ideas into a pedal based recording system that plays back through your guitar amp, studio monitors, or PA system. You can record and overdub multi-layered parts for instant live playback.

Looper pedals are ideal practice tools:

Want to work on your Mixolydian chops by jamming over a bluesy A13 chord vamp? Simply play and record your progression into the looper in the key you want at the perfect tempo.

Working out your song arrangements and studio overdubs? Play and record your parts into the looper by layering them in sequence to hear how they work together. If you don't like the part you played, you can use the undo function "on the fly" to erase the last part you recorded.

Live musicians use loopers to create a bed of chords for solos, backing tracks for entire songs, and even complex vocal arrangements all while performing live on stage. Creative looping has become an art in itself with annual world championship competitions!

Types Of Looper Pedals

There are lots of looper pedals on the market offered by well-respected manufacturers, some being more complex and feature laden than others.

It's important to note that this course is not intended to be a product review, have bias towards any particular manufacturer, or serve as manual for any of these products. I only want to guide you through the typical functions and uses in global sense.

Simple loop pedals feature one multi-function footswitch and a volume rotary knob to adjust the volume of the loop playback. The footswitch on most devices functions as the record, overdub, playback, undo, redo, and stop control.

An LED indicator lights up red when in record mode, is green in playback mode, and will blink at the beginning of your loop to help you keep track of it. Learning how to use these features may take a bit of getting used to as you'll be playing and operating the switch in real-time while playing the guitar.

More involved pedal designs include built in rhythm grooves, user preset storage of your favorite loops, stereo in/outs, and multiple pedal switches. Popular loop pedals include the Boss RC-3, TC Electronics "Ditto," Digitech "Jam Man," etc. Selecting the type of pedal to use will be a personal preference depending on the complexity of your sonic needs and the type of functions you require. I chose to use the incredibly simple and highly respected Boss RC-3 Stereo Loop pedal with drum grooves and a pre-roll function. It also records up to 3 hours of high quality audio and has memory locations to store your favorite loops. You can also load in .wav files to the memory locations and store your presets via USB connectivity.

Signal Chain

Where you place your looper in the signal chain is very important to the recording and playback quality of your ideas.

In my experience, placing the looper at the end of the signal chain of effects pedals will give you the best results and allow you to add effects to layered parts without those effects being added to your recorded material until you want them in the mix.

Bear in mind that any effect you use while recording will be added to the playback. You'll get to see and hear how this works in the upcoming examples.

If you choose to place the looper at the front of your signal chain, effects coming afterwards when selected will affect the entire recording. Tracks that are delayed or have wah added don't sound that great (trust me!), unless you're going for audio weirdness!

Loop Pedal Functions

Let's take a look at each of the switch functions and how to operate a simple looper set-up.

  • Record - When you're ready to start recording, press the switch once and the pedal will go into record mode. Click the switch once to end recording and the playback of your recording will continue to loop. We'll be looking at how to articulate and time your recording and coordination skills in the examples section.
  • Overdub - To overdub a part the pedal must be in playback mode (playing recorded material). Click the switch once and begin recording, then click the switch once to stop recording and continue listening to your playback.
  • Undo/Redo - While listening to a recorded part you can undo a layer of recorded material by holding down the switch for several seconds. The last recorded layer will be removed and you can continue removing layers using this process.
  • Playback - Playback of recorded material is initiated by pressing the switch once from stop mode or from record mode.
  • Stop - Stopping the playback or recording process is initiated by clicking the switch twice in quick succession.
  • Clear a Recorded Loop - From stop mode, Hold down the pedal until the "CL" blinks or you hear the loop stop. This means the loop has been erased.
  • Storing a Loop - In the RC3 you can store your loop to a user location by pressing the "Write" button at top right of the pedal. Use the memory up/down keys to assign the loop to a number location.
  • If you're using a "Ditto" looper, the last loop you played will be stored in the pedal. You can also store those loops into your computer via USB. Read the manual for your pedal and all will be well (This button can also erase your loop if you hold it down for 2 seconds).
  • LED Light Display
    • Play Mode - The function light will illuminate green when in play mode.
    • Record Mode - Red when in record and overdub mode.
    • Rhythm On/Off - Press once to initiate a rhythm sequence. The light will be solid red
    • No Lights Flashing - No lights means there is no loop and it is in stop mode.
    • Loop Indication - Rhythm and Tap Tempo lights both flash red at the beginning of a loop sequence.
    • Memory Location Number - This will have a red dot to the right of the numbers if a loop is recorded at that location.
  • Rotary Dials - Dual concentric potentiometers. Small top knob controls the rhythm volume, and the large bottom knob controls the volume of recorded loop.
Getting Started Looping

In my experience, having a solid grasp on what you’re going to record is the best way to get awesome results. Here are a few tips to use as a checklist when creating a new loop.

Timing & Execution - Loop pedals without a count-in function will require you to have solid timing and good foot execution when tapping start and stop for your recording. This is why you need a clear conceptual idea of what you're about to record. Guitarists new to looping often express that this is the main reason they got frustrated and lost interest in using a loop pedal.

Here's a checklist to help you get started with minimal risk of frustration, and it'll just take a moment to determine each of these factors:

  1. How many bars in length is my loop idea? - Having a solid grasp on this will help you articulate the start and stop points, and time execution of overdub parts.
  2. What time signature or rhythmic feel is it? - Count your idea out as you play it and decide what subdivisions and accents it has...2/4, 4/4, straight 8ths, 6/8, 12/8 triplet shuffle, etc.
  3. What key or modality am I creating this idea in? - Good to know before creating overdubs and playing melodic lines, etc.
  4. What is the intended use for this recording? - If it's to practice a new scale for example, you may want to keep the idea clean and less complex so that you can hear the chord/scale relationship. Plus, you can always add more harmonic layers later.
  5. How many layers will I be recording? - Knowing how many parts you want will help you decide on the frequency range as well as the tonal quality and effects used for each part. Thinking like an arranger and orchestrator will serve you well here.

+ 22 more lessons

Start Course

Reviews

19 results

anthonyfallon

Verified buyer

05/17/26

Refund please

I have asked for a refund twice on your help / customer service platform . as this course doesnt serve my needs but havent heard from you . And I requested this a couple of days after my purchase !!

kentejosh

Verified buyer

03/31/26

Loop Learning

Awesome course and much needed

pab14

Verified buyer

01/14/24

Good Concept

Interesting and creative course.

babashem

Verified buyer

12/10/22

loop d loop

excited to use these looping techniques

Ibbetterguitar

10/09/22

So much fun, finally using my looper pedal

Great course, simple to work through and so practical. Glad I gave this one a try.

Stop searching. Start improving with All Access.

Try 14 days free. Cancel any time.