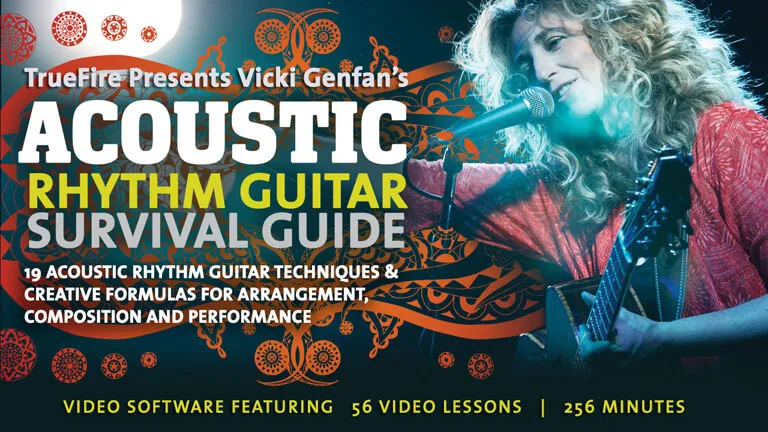
Acoustic Rhythm Survival Guide

19 acoustic rhythm guitar techniques & creative formulas for arrangement, composition and performance

Marty FriedmanTommy EmmanuelSteve VaiEric GalesEric Johnson

Get this course and 1,000+ more with All Access

Try 14 days free. Cancel any time.

Purchase Individual Course for $14.99
Acoustic Rhythm Survival Guide

About this course

If you play acoustic guitar, cover popular songs, write your own tunes, perform solo or work in a band setting, or just like strumming on the front porch, this is a must-have TrueFire course of study. At the very least, you need to dig a little deeper here because the Acoustic Rhythm Guitar Survival Guide will blow your mind to Timbuktu and back again. Here's why...

Unless you're a top-notch session player, your rhythm chops likely suck wind. Please don't be insulted--that's true of almost ALL of us; pros and amateurs alike. That's because most of us focus our attention on other aspects of our musicality. We'll spend hours working on a killer lick, but only a fraction of that time working up a killer rhythm part. So naturally, we wind up playing those same old, tired rhythm moves over and over again.

The fact of the matter is it's your rhythm work that earns you the gig, gets you invited back to the jam, lights up your performance, inspires your original material, excites your fellow musicians and draws your audience to their feet. It's all about rhythm.

No one knows this better than your professor of groove, Vicki Genfan. Singer-songwriter, recording artist and solo performer extraordinaire, Genfan gets calls from all over the planet to lay down her rhythmic magic. Crowned champion of Guitar Player magazine's Guitar Superstar competition, Vicki plays all the big international stages from Montreal's Jazz Festival to Germany's Open Strings Guitar Festival to Italy's Soave Guitar Festival.

Vicki's Acoustic Rhythm Guitar Survival Guide steps you through 19 techniques and harmonic approaches for transforming any chord progression into compelling and engaging ear magic of your own. Get a grip on these 19 techniques, and then combine them for hundreds of possibilities to apply in any musical setting. Breathe new life into any cover tune, any solo performance, any original composition, any band or ensemble piece - it's all within your grasp, whatever your style preference happens to be.

Genfan covers changing tempo, changing time signature, changing duration of chords, finger picking, strumming, plucking, harmonics, relative minor substitution, open tunings, harmonic capo, partial capo, color tones, changing harmonic quality, changing voicings, power chords, hammer-ons, pull-offs, using part of one chord progression to make a new progression, "slap-tap" body percussion, and even using different stringed instruments.

Vicki demonstrates all of these techniques and applications over some of history's most famous chord progressions; progressions that are used in hundreds upon hundreds of popular hit tunes. Everything is explained and demonstrated in a musical context - no tedious theory, boring exercises or drawn-out explanations to struggle through.

"These 19 tools can be applied to ANY style of music. They'll open your ears, mind, and creativity in ways that will forever impact the way you approach your rhythm guitar playing. The material ranges in difficulty, but most of the techniques can be implemented right away by the intermediate player. Even the simpler techniques can be applied in a more advanced context very easily, and I'll give you many examples of that throughout the course."

Genfan is the consummate instructor with the pedigree and chops to back it all up; the Acoustic Rhythm Guitar Survival Guide will lift your playing to a whole new level of intensity, excitement, and musicality. Guaranteed. Dig in!

What you'll learn

  • Execute harmonic tapping technique on open strings in standard tuning
  • Create a new song section by extracting chords from an existing progression
  • Apply musical ear training to determine section roles (verse/chorus/intro)
  • Identify appropriate places in chord progressions to insert tapping
  • Transition smoothly between two different song sections
Release date: 08/24/2011 • 4h 16m runtime
Start Course
Sample lessons
19 Rhythm Guitar Techniques
Over a I V vi IV Progression
Strumming Patterns
Strumming Patterns
Technique #6
Substitute Relative Minor
Technique #8
Use Open Tunings
Use Open Tunings
Technique #17

What's included

56 lessons • 50 charts

The Acoustic Rhythm Guitar Survival Guide
Acoustic Rhythm Guitar Survival Guide is the quintessential guide to not only surviving – but also thriving - amidst an ocean of acoustic guitar players all vying for their own place in the world of 'guitar greats', trying to make a unique musical contribution.

With the 19 techniques you'll be introduced to here and just a few of music history's most popular chord progressions, you'll watch and hear your playing rise to new levels of intensity, excitement and musicality in almost no time!

Whether you're a singer/songwriter, arranger, member of a band, playing originals or cover tunes, the hand-picked 'tools' presented in this course will lead you to hundreds of new ways to approach playing acoustic rhythm guitar.

It will also give the writer and arranger tons of new possibilities for creating music that stands out as 'unique' while standing up to history's most successful songs and arrangements.

The techniques we'll cover are changing tempo, changing time signature, changing duration of chords, finger picking, strumming, plucking, harmonics, relative minor substitution, open tunings, harmonic capo, partial capo, color tones, changing harmonic quality, changing voicings, power chords, hammer ons, pull offs, using part of one chord progression to make a new progression, 'slap-tap'/body percussion, and using different instruments.

The tools can be used to play ANY style of music. Working with these tools will open your ears, mind and thinking in ways that will forever change and expand your approach to acoustic rhythm guitar playing.

The material in the course will range in difficulty, but most of the techniques can be implemented right away for the intermediate player and even the advanced beginner. Look through the videos, as there are also some really cool advanced techniques and examples.

Even the simple techniques can be applied in a more advanced context very easily. For an example of this, you might want to listen to my arrangement of Norwegian Wood, which uses a 'harmonic tapping' pattern for the verses.

For the less advanced players, take your time! With patience and persistence you will find your way through the more difficult tools – and will be amply rewarded for your hard work!

Special Note for the Songwriter: I would highly suggest that you start a notebook, or dedicated area where you can take specific notes relating to songwriting. So much of the material we will cover in the course has already inspired me and my writing as I've been preparing, I'm sure you're going to have a similar experience. Additionally, I highly recommend having some kind of recording device at hand at all times! You don't want to lose any of these magic moments.

So – with that... let’s get going!

19 Rhythm Guitar Techniques
One of the initial motivations for creating this course came from watching the musical-comedy group, 'Axis of Awesome' perform their "4 Chord Song' routine it ended up going viral on YouTube. They showed us that hundreds, if not thousands of hit songs use the very same chord progression (In this case it was I-V-VIm-IV)!

If that's the case, then what distinguishes one song from the next?
What can we learn from this?

Certainly each song has its own melody and lyrics... but what are the other elements that give a song its unique 'ID'? Acoustic Rhythm Guitar Survival Guide answers these questions and more! You'll discover that you only have to know a handful of chord progressions in order to play and/or write thousands of songs!

Drawing from the 19 tools I've presented here, some which are my own special creations, and many which have been used by hit-makers across all styles of music, you'll have enough fuel to ignite your creative sparks into a raging fire.

To get started, we're going to use that same progression that Axis of Awesome used - the I-V-VIm-IV.For those of you new to chord vocabulary, the roman numerals refer to the number of the root of each chord, based in a particular key.

For instance, in the key of G, the I chord is a G Major chord. The V chord is D Major, as D is the 5th note in the G scale. The VIm refers to the chord starting on E or the 6th note of the G scale. The lower case ‘m’ lets us know this is a minor chord. Finally, the IV refers to the C or 4th note in the G scale.

This is a Major chord. If you're new to music theory and want to learn more, it’s worth finding a good teacher or check out the TrueFireTV curriculum to find the course that's right for your level.
Changing Time Signatures
Most music in the Western world is in 4/4 time. Our brains and bodies are very used to the feel of this and can easily move to pulses that are grouped in 2's and 4's.

One way to bring a 'fresh' feel to your song or accompaniment is to try playing in a different time signature. 3/4 or 6/8 are the next most common time signatures – and we tend to be pretty comfortable playing and listening to music in these time signatures as well (just because you're playing in a 3/4 time doesn't mean you're playing a Waltz).

TRY THIS: Take a song you know that's in 4/4 and play it in 3/4 or 6/8. Does it work? How does it feel? Do you have difficulty phrasing the lyrics and melody? What if you played only one section of the song in the new time signature? How does that sound and feel to you?

Odd Meters: To really shake things up, let's look at what's referred to as 'ODD METERS' for a moment. We'll look at 5/4 and 7/4. These time signatures can seem daunting to us, but I'll show you a way that I've found that makes feeling these time signatures, and hence, playing them, really easy.

Since we're already comfortable feeling groupings of 2 and 3 notes we're going to use syllables to represent each note and take away the need to count with numbers.

- For groupings of 2 we'll use the syllables, 'TA-KI'.
- If we're counting to 4, then we'll say, 'TA-KI-TA-KI'.
- For groupings of 3 we'll use the syllables, 'GA-MA-LA'.

So – let's put that together and count a measure of 5/4.

We have two options... we can divide it into a group of 2 and then 3: Ta-ki-Ga-ma-la

OR we can divide it into a group of 3 and then 2: Ga-Ma-La-Ta-Ki.

The final step here is to give a slight accent to the first syllable of each group, ie; GA-ma-la-TA-ki OR TA-ki-GA-ma-la

NOW – Take each variation and just with words, repeat over and over so you begin to get the feel and flow of this pattern. Remember, that's all it is – a pattern. A pattern of 2 and 3, and these are patterns that our brain and body are already familiar with!

1 GA-ma-la-TA-ki GA-ma-la-TA-ki GA-ma-la-TA-ki GA-ma-la-TA-ki
2 TA-ki-GA-ma-la TA-ki-GA-ma-la TA-ki-GA-ma-la TA-ki-GA-ma-la

To apply this to a strumming pattern on the guitar, try playing the low bass note on the accented syllables and strumming on the quieter syllables. You can alternate the bass notes. Say the syllables out loud while you play.

Now, here's how we'd do it with 7/4:

GA-ma-la-TA-ki-TA-ki

ORTA-ki-TA-ki-GA-ma-la

Changing Tempo
Tempo refers to 'speed' or how fast or slow you play something. Changing the tempo of your chord progression – or song- will have a profound effect on how the music is perceived. We respond very intensely to tempo and at certain times we may prefer to hear something slow or fast because it gives us a certain kind of energy.

The best way to experience this is to go through your own music collection and pick out two songs – one that's really slow in tempo, the other super fast. Play each one and notice how you feel.

One of my favorite ways to 'trip myself up' with my own tunes is to play them at a completely different tempo... and watch what happens to my lyrical interpretation. It completely changes. Fun!

TRY THIS: There are two things I'd like you to do; first, play something you're familiar with at its 'original' tempo. Then either speed it up or slow it down and again, notice how it makes you feel.

Next – try changing tempo 'mid-song'. For examples of this check out the Beatle's 'Lucy in the Sky with Diamonds'. Not only do they change tempo between verse and chorus, but also the verses are in 3/4 time and the chorus is in 4/4. It's a great example of how you can really add a new element to a song midstream. Also, check out Arcade Fire's 'Wake Up' for a great tempo change that happens about 4 minutes into the song, but takes it out on a whole different 'vibe' than it starts.

Last, but not least, check out my arrangement of Norwegian Wood and listen to the instrumental section and how it changes tempo and time signature, but comes back in the end to the original feel. The tempo change starts around 2:26.
Duration of Chords
Now this technique may be more useful at first glance for the songwriter... however, I think you should also consider experimenting with it in the context of a cover tune you may want to re-arrange. By simply playing each chord for a longer or shorter period of time we change the whole 'cadence' or 'feel' of the song or section.

Try it with either a song of your own, or a favorite cover tune – keep the progression the same, melody the same – but now you'll find that you'll be stretching the melody out longer, when you're holding the chords out for longer time periods, or packing it in more quickly... both will have a dramatic effect on the song.

When using this tool in songwriting mode, you might try holding the chords for a longer duration when you've got more lyrics that you want to sing, and then moving to a quicker chord change pattern when you have fewer lyrics – and can hold them out longer. But ultimately – you'll decide what sounds and feels right to you. I personally find it a really great tool for songwriting and it's so simple that sometimes I forget to use it!
Changing Order of Chords
Songwriters!! For this exercise, that means all of you!

TRY THIS: Get out your recording gear...

1. First, play the progression as we've been playing it, I -V-VIm-IV. Start out with 4/4 time and play each chord for 2 beats. Come up with a simple melody over it.
2. Start the progression with the second chord or the V chord...so it is V-VIm-IV-I. Come up with a simple (different) melody over this.
3. Start with the VIm chord: VIm-IV-I-V. Create your melody.
4. Finally, start the progression with the V chord: V-VIm-IV-I. Create your melody.

Listen back and see how each progression inspired a different melody idea. What if it didn't? That's cool too, but notice how the progression feels different. In particular, notice how the very last chord of each progression feels... does it feel resolved? Unfinished? Is there tension? Does one version of this appeal to you over the others?

Answer these questions and take notes. If you're a serious songwriter, this is good information for you to be gathering for future reference.
Fingerpicking Patterns
In this example really listen to the difference in 'vibe' between a basic strum and basic finger-picking pattern. If you're new to finger picking, take the time to practice this slowly. You can use a thumb pick if you like, but use your 'bare' index, middle and ring fingers.

Also – if you're used to finger picking with just your thumb and one or two other fingers, take the time now to educate all 3 fingers and get this under your belt! From this simple pattern, you'll be able to expand into endless finger picking patterns over time – and who knows – maybe someday you'll be able to play this version of Greensleeves by Alex Degrassi (ok, it's a 39 string harp guitar, but you get the idea – right?)

Body Awareness: Make sure you are NOT holding excess tension in your right hand!!! If you find that you are, take some deep breaths and play the pattern very, very softly. Gradually increase the volume – without 'excess' tension. You may feel tension from your fingers and hand moving up into your forearm and even your neck and shoulders. Take the time to notice this NOW... you will save hours of unlearning time later!

For those who are already good fingerpickers – try doing this very simple pattern with a metronome and gradually take it to faster tempos...always watching out for unnecessary tension. For a real challenge and dexterity exercise, try accenting different notes in the pattern... for example; play the pattern accenting each thumb stroke. Do this for a while. Monitor tension.

Then do the same thing accenting only the second stroke or INDEX finger stroke. Do the same for middle and ring fingers. This is a GREAT workout for the small muscles in the fingers and hand and for your overall rhythmic and musical co-ordination. Relax your belly and relax your jaw... good work!

+ 49 more lessons

Start Course

Reviews

10 results

ctjlynn@hotmail.com

11/26/22

Excellent course! Vicki's teaching is easy to follow and makes learning a pleasure.

Frank L.

04/19/22

Great Course

Vicki is an excellent teacher. I have learnt to adopt many of the techniques already in my playing. She has 'opened up' the acoustic guitar for me. Thank you.

tomac

Verified buyer

07/16/21

I really needed this. Great job

Steve

09/22/20

Super Course

Easily one of the best courses for improving rhythm playing as well as timing!

vmjmurphy

Verified buyer

07/28/20

Brilliant course!

Of course it's about rhythm, but it's certainly not just strumming - also got fingerpicking, plucking and lots more besides. So it's really about accompaniment - and gives you pretty much everything you need to know to sound great playing pretty much any genre of song. Loved it!

Stop searching. Start improving with All Access.

Try 14 days free. Cancel any time.