Play Rock Guitar 9: Advanced Lick Vocabulary

Rev Up Your Rock Guitar Licks with this Rock Learning Path Core Course

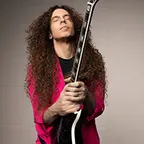
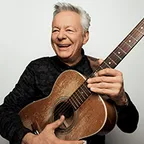
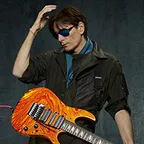
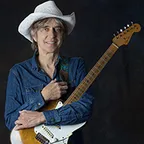
Marty FriedmanTommy EmmanuelSteve VaiEric GalesEric Johnson

Get this course and 1,000+ more with All Access

Try 14 days free. Cancel any time.

Purchase Individual Course for $5.00
Play Rock Guitar 9: Advanced Lick Vocabulary

About this course

Welcome to Play Rock Guitar 9: Advanced Lick Vocabulary for late intermediate to advanced students of Rock guitar.

This Rock Learning Path core course is presented by 13 top TrueFire educators: Mike Stern, Andy Timmons, Neil Zaza, Oz Noy, Shane Theriot, Chris Buono, Angus Clark, James Hogan, Jennifer Batten, Rusty Cooley, Jeff McErlain, Tony Smotherman and Wil Sophie.

The Advanced Lick Vocabulary curriculum is comprised of select Rock guitar lessons from the educators’ existing TrueFire course libraries.

As your technical skills advance, you’ll be able to call on a more sophisticated vocabulary in your solos and improvisations. The vocabulary in this advanced core course is designed to stimulate you creatively and further advance your skills with challenging right and left-hand techniques. Learn these licks as presented and then use the ideas and technical approaches to craft your own vocabulary.

Play Rock Guitar 9: Advanced Lick Vocabulary is organized into 2 sections. In the first section, you’ll work on concepts and insight you will need to step up your lick playing. Everything from hybrid picking and vibrato to symmetrical scales. . In Section 2 you will dig into a ton of essential and challenging licks. Once you get these licks under your fingers you will be ready for anything!

The educators demonstrate all of the key examples over jam tracks (where and when applicable) to simulate a real-world application, in a musical context. All of the key examples are also tabbed and notated for your practice, reference and study purposes.

You’ll also get Guitar Pro files so that you can play, loop or slow down the tab and notation as you work through the lessons. Plus, you’ll have all of the available jam tracks to work with on your own.

Take as much time as you need to work through each video guitar lesson before moving on to the next lesson. If you want to dig deeper or wider into any of the topics covered in this core course, check out the recommended supplementary courses in your learning path where you’ll find more examples, techniques and insight from top TrueFire educators.

Grab your guitar and let’s get started!

What you'll learn

  • Combine pick tapping and pull-off techniques
  • Complex right and left hand techniques
  • Advanced rock guitar lick vocabulary
  • Sophisticated improvisation techniques
  • Develop legato and tapping techniques
Release date: 09/14/2016 • 3h 17m runtime
Start Course
Sample lessons
Arpeggios: Triads and Beyond
Concept 7
Moving Across The Neck
Concept 3
Alright Arps
Alright Arps
Lick 12
The Dominator
The Dominator
Lick 42

What's included

68 lessons • 63 charts • 50 Jam Tracks

Play Rock Guitar 9: Advanced Lick Vocabulary
Welcome to Play Rock Guitar 9: Advanced Lick Vocabulary for late intermediate to advanced students of Rock guitar.

This Rock Learning Path core course is presented by 13 top TrueFire educators: Mike Stern, Andy Timmons, Neil Zaza, Oz Noy, Shane Theriot, Chris Buono, Angus Clark, James Hogan, Jennifer Batten, Rusty Cooley, Jeff McErlain, Tony Smotherman and Wil Sophie.

The Advanced Lick Vocabulary curriculum is comprised of select Rock guitar lessons from the educators' existing TrueFire course libraries.

As your technical skills advance, you'll be able to call on a more sophisticated vocabulary in your solos and improvisations. The vocabulary in this advanced core course is designed to stimulate you creatively and further advance your skills with challenging right and left-hand techniques. Learn these licks as presented and then use the ideas and technical approaches to craft your own vocabulary.

Play Rock Guitar 9: Advanced Lick Vocabulary is organized into 2 sections. In the first section, you'll work on concepts and insight you will need to step up your lick playing. Everything from hybrid picking and vibrato to symmetrical scales. . In Section 2 you will dig into a ton of essential and challenging licks. Once you get these licks under your fingers you will be ready for anything!

The educators demonstrate all of the key examples over jam tracks (where and when applicable) to simulate a real-world application, in a musical context. All of the key examples are also tabbed and notated for your practice, reference and study purposes.

You'll also get Guitar Pro files so that you can play, loop or slow down the tab and notation as you work through the lessons. Plus, you'll have all of the available jam tracks to work with on your own.

Take as much time as you need to work through each video guitar lesson before moving on to the next lesson. If you want to dig deeper or wider into any of the topics covered in this core course, check out the recommended supplementary courses in your learning path where you'll find more examples, techniques and insight from top TrueFire educators.

Grab your guitar and let's get started!
Concepts and Insight
In this section you'll go over some of the concepts you need to have a grasp on in order to be able to pull off the more advanced licks.

TIP! More advanced licks usually have one of two things, if not both that make them more difficult. Speed and number of notes, and harmonic structure.

I find that working on licks helps me isolate these things. If there is a particularly fast section to a lick, break it down into smaller parts and work on those. Make sure that your picking is correct and efficient, make sure your fretting hand fingers stay close to the fingerboard. These little details are usually what make or break a lick.

If the sound of the lick is new or different to your ear, try isolating the notes that are making it sound that way. Then just play those notes over the chord that is being played and listen to what is happening in there. Sometimes if you can just get the "sound" of the lick to sit properly in your ear, it makes the mechanics of actually playing it much easier.
Arpeggios: Triads and Beyond
Arpeggios: Triads and Beyond - Concept 7 is a video guitar lesson presented by Andy Timmons and is sourced from Electric Expression.

Arpeggios. When this word comes up a lot of people tend to think of neo-classical shredding and sweeping, but that's not what we're going to talk about today. It's basically the use of arpeggios in your melodic lines. It doesn't all have to be three octave sweeping type ideas, which those are great and I love that kind of playing, but what I want to talk about is how I approach using arpeggios in my improvisations and showing where they come from. It will fit in quite well with everything else that we're talking about here and it's actually quite simple. Going to stick in our trusty D minor for this. As we pointed out already, in this D minor to B flat chord progression we've related it to the fact that it's D minor aeolian. So not unlike your D minor pentatonic, we're just adding two notes, the E natural and the B flat. In a lot of, when I first delved into scratching the surface of modes and all that it was, I didn't want to think of everything as individual modes, but I did want to relate them to whatever the mother major key was. In this regard it's F major. At that point for me, it was easier to think of it that way and maybe it will be for you. So we know that D minor aeolian comes from the key of F major and these triads that I'm going to show you are basically going to be right up the F major scale. Going to start with the F major triad it's just F, A, C. If you harmonize that scale and move up each scale degree the second note, G, is a minor chord, so G minor, F major, G minor. The third scale degree is harmonized in minor as well it's A minor. So that's a nice little exercise, again, allowing you to bridge some of your favorite positions together with these arpeggios. So essentially, if you're in the key of F major or D minor in its aeolian mode, all these triads work. Some of them have more tension than others depending on what chord is sounding at that time. Like over the D minor, it's kind of pretty inside sounding, because it's got the seventh, the fifth, the third, and the seventh. So it's actually a nice arpeggio to play over the D minor. Anywhere you can find an F major triad, will sound good over that chord. Next is the G minor, and clearly it's a lot of notes not in that chord, so it's definitely not as pleasing, because it has the tonic, but it's got the B flat, that flat sixth and the fourth scale degree.

I'm a big Wes Montgomery fan, so I've been learning some of his tunes and some of his solos and any time he's got a minor chord, like a D minor chord. I was learning "Impressions" last night, which happens to be in the key of D minor. He'd play an A minor triad over that D minor, and it's nice because its got the ninth scale degree, the seventh, and the fifth. So it's the same idea. He's taken an arpeggio from the key, but that has a couple of nice color tones or he might play a C major triad. So that's a nice application of what I'm talking about here that could be played over that D minor chord. You've got the D minor triad, which of course is the most obvious pleasing inside that's got the chord tone. But the idea is super-imposing some of these other triads, these arpeggios. Over that B flat, that D minor arpeggio sounds beautiful because it has that major seven like I talked about. It's got the major seven, five, and third and you get down to that B flat major. Of course that's the home triad for that chord, so that's the idea. If you know the key that you're in you can apply the triads that are diatonic to that key. Again, you've just got to season to taste. You've got to use your ear to find out what works and what sounds good or maybe what doesn't. So no wrong or right. It's just up to you as the player to figure out what sounds best to you and hopefully that's interesting to the people listening to you. So let's apply some of these ideas. Let's take the ending of Cry For You, where it's pretty rocked out and I'm going to play some of these triatic ideas incorporated with some melodic lines, so you can hear some of the tension and release with arpeggios. As I was hoping to demonstrate there is just playing simply some of the arpeggiated ideas. Just straight down the F major scale, playing the diatonic arpeggios anywhere you can find those three-note groupings. It's going to be a great way to add just a little bit more excitement and harmonic content to your playing. So have fun exploring those possibilities.
Hybrid Picking
Hybrid Picking - Concept 4 is a video guitar lesson presented by Andy Timmons and is sourced from Electric Expression.

We're going to talk about hybrid picking and initially, when I was asked to do a little section on hybrid picking I thought, well I don't really do much hybrid picking. But, in fact, I do. We're going to use the song "Farmer Sez" from my very first record Ear X-tacy to illustrate some of that. Hybrid picking is using your pick and your fingers. I've got a little country kind of chicken pickin' tone, because that's what I used on the "Farmer Sez" track. A little bit compression on my clean channel and some slap back echo and you got it going on. I'm just going to start with talking about the "Farmer Sez" riff, because that indeed is using pickin' fingers and it's a nice sound. That's all pick but I'm basically using the pick on the lower tonic note. That is almost the bass roll. Basically, "Farmer Sez"is a blues. It's a 3-chord blues in A7. It basically goes around the changes. A7, D7, A7, E7, D7, to A7. All the hybrid stuff, some of the double stops, it's all going to be based on that harmony. The initial riff I'll show you is real slow. There's that seventh and third of the A7. Again, referencing what chord shape it can be related to and I'm kind of pivoting. There's a B and an F#, like a B5. Pulling off of the open D and G string. I hammer on, the E to the F#. So let's start with that a little slower. When I get to the IV chord, the D7 or D9, a little tension and release there. It's super-imposing a C chord over the D. Then releasing it, sliding to the D but just playing the fifth. The D and the A on the G and D strings. Hammering off the lower A string, then pulling off each time. I should've pointed out, I'm using my pick on the low string and then just my third and my middle and fourth finger. You have to figure out what fingers I'm using folks and it's pulling up. But it's a nice tone. You get the flesh and the nail on the string. We're almost there, we've got the I chord. On the IV chord it's back to I. Now the E chord. It goes back down to these two. So there, let me slow that down, that's over the E chord. It's basically just a little lick that outlines the third of that E7. That G# is surrounding it. We'll talk a bit more about chromatic voice leading later, then we're back on the D chord. Starting on a little sixth idea, meaning playing notes that are a sixth apart. You've got F# and a D, which is the root and third of that, of the D7. A common little country lick is to do that sixth and go down chromatically a whole step.

I'll show, from the V chord one more time slowly. I'm on that third and seventh of the D7 chord and that's a fancy ninth chord of a D7. You've got the seventh, ninth, third, and root in the tonic. Let me play the whole thing one more time, in time. Playing it slower you can get a feel for how it flows together. Also take note of how I'm giving some particular emphasis to certain notes, where I'm really pulling up on the string. See how that line has a shape to it. There's some dynamic within. See how that top chord is more accented. So some dynamics within, and that's what's cool about the hybrid picking, it is really the under note that can be a little bit more tucked in. So clearly it can be used for double stops. I've got a backing track set up where I'm going to play the "Farmer Sez" riff slowly for you over that so you can hear it with the groove and then I'll improvise a little bit and I'll use some of this hybrid picking technique. Some of the ideas that came out during that little improvisation after the "Farmer Sez" lick. Giving some emphasis to some of the notes, like that was just bending from the F# to the G and just with my middle finger, giving that note a little bit there's a lot of alternating between the pick. So it can be simultaneous or it can be alternating, which is commonly what I do, it's just the pick and middle finger. So have fun with that. It's just another thing to spice up your playing a little bit. Works with distortion also. Stevie Ray was a great proponent of that when he'd get into some of those bends he'd be underneath that string. So clearly it's not just for country, you can rock out with some of the hybrid picking examples as well.
Vibrato: A Player's "Fingerprint"
Vibrato: A Player's "Fingerprint" - Concept 9 is a video guitar lesson presented by Andy Timmons and is sourced from Electric Expression.

Let's talk about vibrato. Vibrato is really one of the most defining parts of a player's identity. It's how, when you hear Eric Clapton you know immediately that's who it is or Eric Johnson or Hendrix. Whoever it might be. The vibrato is such a highly personal thing and it's what really gives your playing a vocal quality, because it's kind of adding vibrato like a singer would, or maybe a violinist, or another string player. So I thought I would demonstrate a couple ways that I do it. Again, there's no right or wrong ways, but it's something that I think kind of naturally develops over time. A lot of players in their younger years tend to have a pretty fast vibrato, because it's kind of hard to control and so the tendency is really over-vibrato sometimes. So I'm going to talk about some ideas of how to slow it down a little bit and how to hopefully get the most musical type of vibrato that we can. A great exercise to start out with, believe it or not, is no vibrato and I find that for some players this is really difficult to do. Just to play a note and not do anything with it because I think most of us that play electric guitar, the first inclination is we want to do something with that note. See if you can do it. I mean, even right now my hand is aching, like it wants to do something. But let's try not having any vibrato, then adding a little bit of vibrato just slowly and I'm achieving that by pulling down with my wrist. I'm going to analyze some of this for the first time while I'm talking to you and I see that my thumb pulls away from the neck, at least on this particular note. If I'm fingering certain notes without vibrato I'll tend to have my thumb up here, but when I start giving it, instead of holding on with this part of my thumb I'm actually clenching the neck between my finger and that part of my hand. Then I'm shaking the bottom of my hand. I'm pulling down with the wrist. One of the things to think about with vibrato is tuning, because if you have too nervous of a vibrato or too fast you can tend to over-pull the string and it can get a little sharp. Sometimes that's not a good thing. But on that note it can be a good thing, because that's the, minor third that sounds good slightly bent. Let's try it on the tonic note. I'm thinking in the key of B. There's a great example of over-vibrato, and there's some players that bring the finger all the way off. I mean, bring the hand completely away, some people do a circular thing. I haven't personally developed that. I noticed with my third finger that I do anchor a bit more with the thumb again. First finger, I'm away from the neck a bit more and clenching with that part of the hand. The reason I think that that's happening for me is because with that third finger I'm able to grab the neck in a certain way to get the vibrato, but then I'm in a good position to bend beause I anchor a lot when I bend, and we'll discuss that in another section.

For now, let's take that note and just not do anything with it. Add that vibrato, and there's your Foxy Lady. Good Jimi vibrato. Not to say that fast vibrato doesn't have a place too, because sometimes for energy you might want to get the nice energetic vibe to it. But again, one of those defining parts of a player's personality is not all the fast stuff but what happens when they resolve that note. Certain players that have a lot of technique and play real fast all the time, sometimes their vibrato can also reflect that. When they land on a note it might just be too nervous or too fast. So let's also work on vibrato on the bend, because that's another expressive part of guitar playing is having that note bent, and then adding some vibrato to it. Now I'm anchoring quite heavily with the back of my hand and with my thumb. The width of your neck might dictate whether this is an appropriate technique for you. My signature guitar has a pretty narrow neck shape, so it's easy for me to wrap my hand around it. Your neck may be wider, and it may not be the best technique for you to duplicate, but again, just depending on the size of your hand as well. Jimi had extremely large hands so he easily wrapped around. I think I'm pretty average in the size of my hand. But anchoring does help, however you can. I like that bent-note vibrato where I keep re-bending up to it. It's almost a form of vibrato. Of course, with a bent note you can actually get the pitch below and above the actual note you're bending to, whereas when you're fingering and fretting a note you can only go sharp with it. This particular guitar is set up with a tail piece that I call on the deck. I can't pull up on the bar at all. It's strictly for going down in pitch and in a second we're going to demonstrate with the guitar that I've got with a floating tremolo, so you can hear that expressive quality. It's also not a bad thing to start with a faster vibrato, then slow that down. That can be a really nice quality at the end of a phrase.

So let's go to the guitar with the floating tremolo. As you can see I've switched to my AT100 that has a rosewood neck, and I've got this guitar with a floating tremolo. Most of my guitars are set up with the tremolo on the deck, because I like the stability of more of a set tail piece. But there's a huge amount of expression that you can get with a floating tremolo that you can't get with that kind of set bridge. So that's why I've got the guitar set up this way. The reason that it's white and with a rosewood board is because my hero Jeff Beck had one on the cover of the "Wired" album. That beautiful white strat, Olympic white. To that end, I'd like to just talk about Jeff for a second and that the level of expression that he achieved and continued to develop all these years, he's still pushing the boundaries of the electric guitar, and for me one of the most inspiring players ever. He could've stopped at "Shapes of Things" in '65 and still have been legendary. That's a landmark solo. But he's conitnued to evolve and he never just settles back and does what he did on the last record. He's continually, like I say, pushing the boundaries and exploring, and one of the things that he's highly developed is his use of the tremolo bar, the whammy bar. So not only does he have a great finger vibrato, but he can add the whammy bar with it floating in this haunting, beautiful quality. So I'm going to demonstrate a little bit of playing with that, where I'm just subtly raising and lowering, sometimes dipping into notes. Maybe we'll play along with the track a little bit and just give you another little sampling of this kind of vibrato. So as you can see with the floating tremolo you've got the ability to not only have your finger vibrato, but there's an extended level of expression because when you can raise and lower the pitch of that with that tremolo bar it works great for chords as well. So explore all these different ways of achieving the vibrato. Again, it's really that part of your playing that really will help define your musical expression. It's your soul coming out through your instrument, and start slow. Try it without the vibrato. It's really difficult to do, but it's a lot of fun, and again, it's just going to take your levels of expression to a new height. So have fun.

Bending: Gateway to Expression
Bending: Gateway to Expression - Concept 10 is a video guitar lesson presented by Andy Timmons and is sourced from Electric Expression.

Let's talk about bending. Along with vibrato it can be one of the most defining parts of a player's identity and bending is something I love to do. It's a major part of what I do. So let's break it down a little bit and define some of those components that will help you improve your bending. Let's just start in the key of A minor. Get my echo level right and just a simple bend. We're going to bend from the D. Whole step bend up to E and I'm going to check the pitch of the note that I'm bending to, fretting on the B string, the E note. It's good to have an idea of what pitch that you're intending to bend to, because one of the most difficult things is tuning. When somebody's bending you get exactly to the pitch that you want to get to and talking about the different fingers to use. Clearly you can bend with any finger but the strongest to me is the ring finger and I'll support that finger with the other two fingers. So I've got my index and middle finger along with the ring finger then I'm also anchoring with my thumb. So you've got all these pressure points. You've got the top of the neck with the thumb. Again, I'm grabbing underneath the neck here. At that point, that finger has a lot of strength. Try bending up to the note without any vibrato, as difficult as that might be at first because it does take a lot of repetition to really build up that strength in these fingers but after a while I think you'll get it. There are several different ways you can bend this note. You can actually start from the fretted note and bend up to it. But you can also do what's called a pre-bend. You can actually start the note pre-bent to the pitch desired and bend down. You can also exceed the pitch and go to the next note. It's called an over-bend, but we'll get more to that in just a moment. So that's just a whole step bend. That's going from D to E. Now another way of working on that, like I talked about is fretting the desired pitch. You can do that and do what's called a unison bend. So you're actually bending from one note to another while holding that same note. So it's a two-note cluster and you hear it when it's spot on. This is easier with more of a fixed bridge guitar. The floating trem will tend to bend with you so it might be a little bit more difficult to achieve. But holding the note E on the B string, and then bending up to it from the D on the G string. Classic kind of Hendrix blues. That was just going up the pentatonic in A minor. Then when I got to the top I just bent another unison bend but from the G to the A, which is the tonic of that key. The root, relying heavily on not just the third finger, but the index finger and the middle finger behind it, bending up to the note, then adding that vibrato to it and there's that pre-bend again. That can be a really expressive device to use. Pre-bend descending and then have another note coming below it.

Now something happened there that's another part of bending that I want to talk about and not just a full step, but that was in the blues realm. That flat third can be really nice to bend just slightly. This pulled slightly down on that C note. That time I did a bend with my first finger, but I tend to find it easier if I'm going to bend with the first finger, it's going to be pulling it down instead of bending it up. I just find it easier with that finger to pull down, because it has more strength. Bending up with that first finger you don't have the other guys helping out. The bend that I was talking about previously is in between the C and the C#. There's that same idea, just on the B string up the octave. Now if I had a choice to play, obviously that's the same pitch level, just in a different spot on the B string than on the E string. I get more tone and more stability out of the B string for those notes and you've got more wiggle room, so to speak, for the vibrato. You're on the edge of the neck there, so sometimes I might shift up there just for sonic reasons. I think it's a better tone for me. So we've got the full step bend, the unison bend, the pre-bend, and then up to the tonic.

Now some of my favorite players over time, guys like Stevie Ray and Steve Lukather and Albert King, they'll do pretty wide bends. They'll go beyond just the normal whole step, and they'll go minor third, major third, sometimes even more than that. But one of my favorite places to do that is, bending from the seventh up to the ninth, then up to the root. So I'm actually exceeding the root, going all the way. It's actually easier to do on the G string. I just did it on the B string. But if I start with G on the G string the target note is B. That may be my favorite one when I'm bending from the flat third to the fifth. So three different pitch levels just happened. I did the minor third to the fifth, bent up slightly to that crack between the C and the C#. Then I went up from the fifth to the seventh, the flat seventh. So that's just a minor third bend. Whereas this is a major third, minor third, and then I slid up, sliding from the flat seven to the nine. A little sharp, I need to work on this stuff also folks. So those are some of my favorite bends. Again, building up the strength may take a little while and just being accurate with the pitches. You can see some of my bends are a little out of whack there as well. So I look forward to improving my bending along with you guys. Which leads me to what I think might be a good exercise to work on. It explores some of our horizontal ideas as well and that's just bending from a note to the next note in the scale, all the way up one string. We'll start this in the key of A minor. Going to start down in the second fret. Then I'm going to play the second to the third and that's where the exercise actually begins. So I'm basically bending through the A minor, A natural minor scale or aeolian if you want to call it that. You can descend as well. Now the descending, I was doing as a pre-bend. There's a couple of helpful insights into the way I bend and the way I think about bending. Work on the pitch accuracy and the feel and vibrato of it.
Moving Across The Neck
Moving Across The Neck - Concept 3 is a video guitar lesson presented by Shane Theriot and is sourced from Solo Mojo.

Here's a descending idea with the same kind of sound (dominant/mixolydian), but this time I've used a few position shifts. This one is great to get around the fretboard and start connecting chord tones. It moves horizontally across the fretboard and is based over a G7 chord.

+ 61 more lessons

Start Course

Reviews

2 results

solinski

Verified buyer

04/22/21

Excellent Course

This course teaches concepts and licks from an amazing collection of instructors and players including Andy Timmons, Oz Noy, Chris Buono, Angus Clark and Rusty Cooley! An excellent way to have techniques explained and then demonstrated with licks!

javierON01

Verified buyer

10/14/20

The best on the internet to learn guitar

Stop searching. Start improving with All Access.

Try 14 days free. Cancel any time.