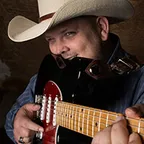
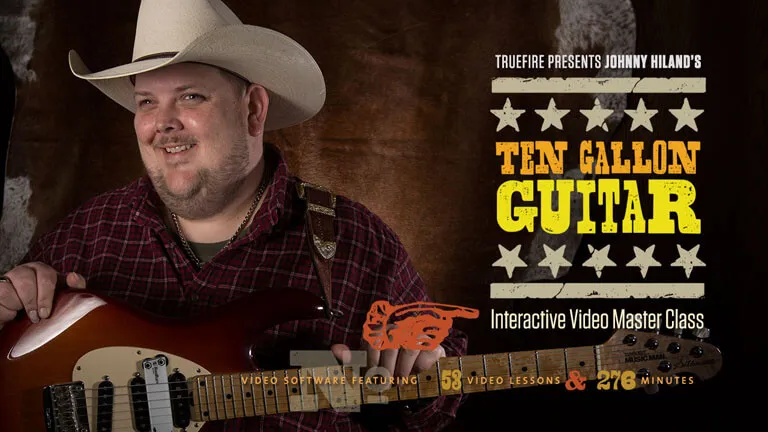
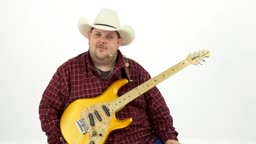
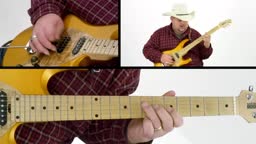
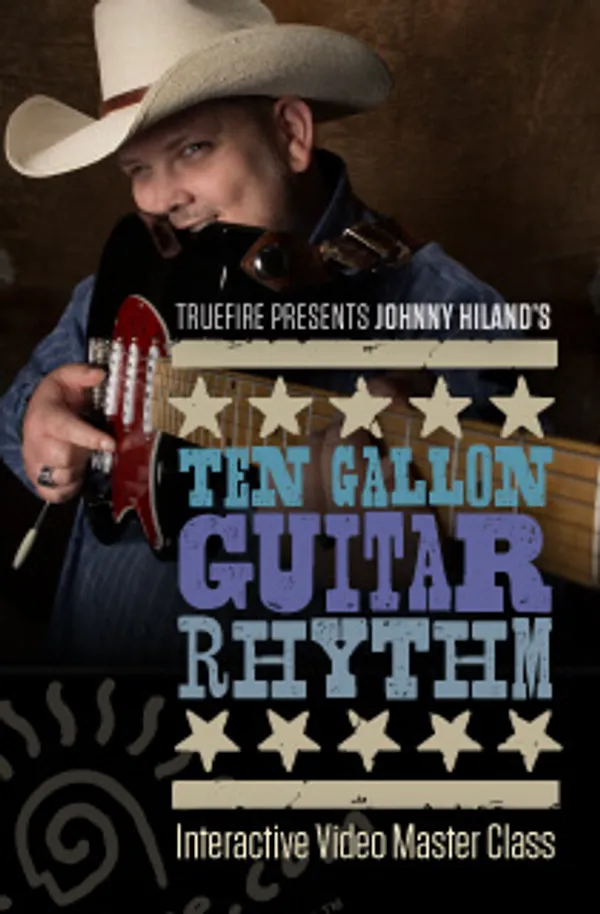
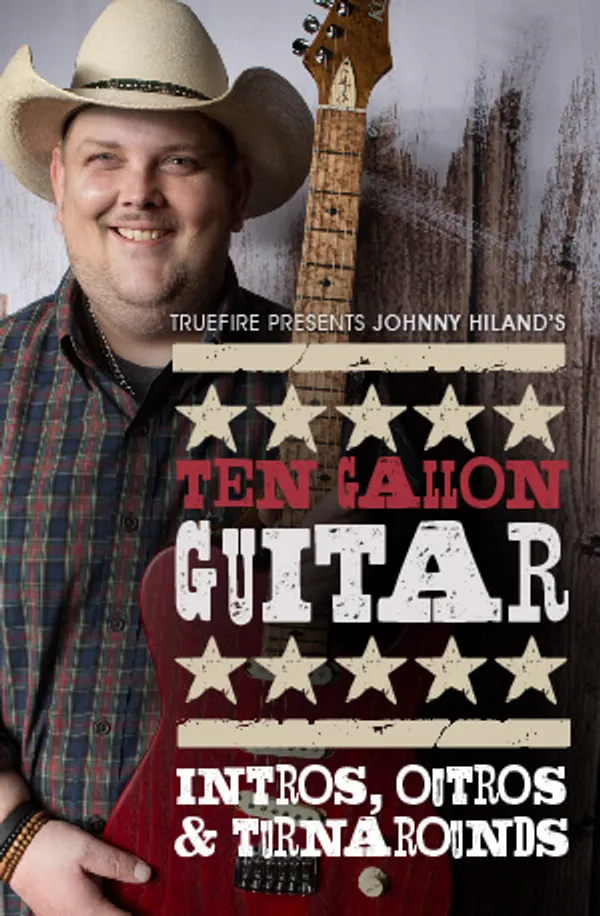
Most of you won’t even read this course description because all you really need to know is that Johnny Hiland reveals all in this new master class course of his. So cool.. click the add to cart button, download it now, grab your guitar and lock yourself in the shed with Johnny Hiland’s Ten Gallon Guitar.
For the rest of our guitar playing friends, we can only assume that you’re just now returning from a 10-year expedition up the Amazon river or have otherwise been distracted from the modern world of guitar because Johnny is perhaps the most talked-about player of the decade.
If you wrote a movie about Chuck Berry’s Johnny B. Goode, you’d use Johnny Hiland’s bio as your script guide...
ACT I: Born legally blind in the small New England town of Baileyville; parents put a guitar in his hands at the age of two; performs on TV at age seven; wins Talent America contest at age ten; plays in a variety of bands; loves and practices country, bluegrass, swing, blues and rock music; develops his signature style that blends all of those styles; moves to Nashville in ’96 to pay his dues playing the honky-tonks on lower Broadway.
Deep down in Louisiana close to New Orleans Way back up in the woods among the evergreens There stood a log cabin made of earth and wood Where lived a country boy name Johnny B. Goode Who never ever learned to read or write so well But he could play the guitar just like ringing a bell
ACT II: Johnny lands gig with the well-known Don Kelley Band at Robert's Western World; performs on TNN's Prime Time Country and the legendary Grand Ole Opry; records and performs with a Who’s Who of country, blues and rock artists including Toby Keith, Trick Pony, Randy Travis, Ricky Skaggs, Janie Fricke, Lynn Anderson, Hank 3, Sammy Hagar, Ted Nugent, George Clinton and P-Funk, Les Paul, Steve Vai, Joe Bonamassa, G3 and many others.
He use to carry his guitar in a gunny sack And sit beneath the trees by the railroad track Oh, the engineers used to see him sitting in the shade Strumming to the rhythm that the drivers made People passing by would stop and say Oh my, that little country boy sure could play
ACT III: Johnny signs first record deal with Steve Vai on his guitar-centric label, Favored Nations; tours globe with his own Johnny Hiland band; draws standing-room crowds at all of his concerts; dozens of top manufacturers produce signature Johnny Hiland models of their products; becomes widely recognized as one of the top contemporary guitar artists.
His mother told him someday he would be a man And he would be the leader of a big old band Many people coming from miles around To hear him play his music when the sun go down Maybe someday your name would be in lights Saying Johnny B. Goode tonight
Fortunately for we students of guitar, Johnny is also a highly skilled educator who loves to teach and pass on whatever he can to other players. Ten Gallon Guitar is Johnny’s first in-depth interactive video course and we’re honored that he chose TrueFire to help him present and share the key concepts, techniques and creative approaches that comprise his signature style.
Johnny organized his curriculum into two sections. In the first section, Johnny presents the 17 key concepts, techniques and tunings that comprises his signature ‘Ten Gallon’ style, which fuses country, blues, rock, funk, rockabilly and swing.
Johnny presents and demonstrates: Warm Up Exercises, Warm Up Scales, Chicken Pickin' Technique, Focus Scales, Open String Licks in E, Open String Licks in A, Open String Licks in G, Open String Licks in D, Open String Licks in C, Double Stops Exercises, Double Stops Licks: 1, Double Stops Licks: 2, Double Stops Chords, Pedal Steel Bends: 1, Pedal Steel Bends: 2, High-Low-Low-High and Western Swing Technique. He also presents two extensive rundowns of his guitars and gear in this section.
In the second section, Johnny steps you through 10 Performance Studies where you’ll learn how to apply all of the key concepts and techniques from the first section, in a real-world musical context.
Johnny applies the concepts and techniques across a variety of styles and keys ranging from country and western swing, to blues and hard rock, to rockabilly and country rock: Country groove in the key of D, Chicken Pickin’ study in the key of A, Chicken Pickin' Half Time groove in the key of A, Country Shuffle in the key of D, Western Swing in the key of G, Rockabilly study in the key of E, Blues groove in the key of B, Heavy Rock in the key of A, C Funk groove in the key of C and a Country Rock study in the key of C.
Johnny demonstrates all of the key concepts and techniques over rhythm tracks, and then breaks it all down in a clear and very accessible manner. All of the performance examples are tabbed and notated, plus all of the rhythm tracks are included for you to work with on your own.
The sequel to our Johnny B Goode movie is all about you and your own Ten Gallon Guitar!
Go go, go Johnny go go Go Johnny go go, go Johnny go go Go Johnny go go, Johnny B. Goode
What you'll learn
Apply focal scales over blues chord changes
Use chromatic runs to connect chord tones
Play sparse, vocal-style blues phrases
Incorporate chicken picking techniques into blues playing
Understanding Johnny Hyland's complete gear setup for chicken picking tone
Hello everybody, I’m Johnny Hiland and welcome to Ten Gallon Guitar. Music makes me smile and I absolutely and sincerely love to teach and I’ve wanted to do this course for a number of years. I’ve been a huge TrueFire fan, and I want to share all of the licks and many scales and fun things that I do and everything I’ve learned from my mentors, from Danny Gatton to Albert Lee and stuff the I’ve picked up on my own. I just wanted to pay it forward in a good chicken pickin’ fashion.
I’ve organized this course into two sections. In section one, we’re going to talk about what makes chicken pickin’ what it is and I’m going to take you back through every little thing that I’ve learned throughout the years which has let me become the artist that I am today. Being born legally blind, I wasn’t able to watch videos, like you guys can or read tablature, so I’ve had to learn a lot of things on my own. I’m going to open myself up directly to you, and cover things like the high-low/low-high pattern that I’ve come up with. But, then we are also going to get back into the chicken pickin’ elements like open string licks, double stops, to where you can find chord shapes using the double stops, steel guitar bends and I’ll get to teach you so you can use your volume knob to do some steel guitar swells to make it sound like a true steel guitar. You will be able to check out my gear and we’re going to have a whole bunch of fun!
In section two, we are going to take all of the knowledge we gained in section one and we’re going to put it to good use over 10 band tracks I’ve created just for this course. I got to play acoustic guitar, some bass and some drums. I’ve created these on my own and I know we are going to have a blast. We’ve covered so many genres from traditional Country to modern Rock and country and we’ve jumped into some western swing and some blues, and of course hard rock.
We’re going to start off with a good mid-tempo country track in the key of D. We’re going to fire it up with nice fast ripen train beat song in the key of A. Grooves can certainly change the way you approach a solo, so let’s take that same ripen track in the key of A and add a half-time groove to it. Shuffles are definitely an intricate part of the tradition of chicken pickin’, so we’re going to look at country shuffle in the key of D. I’ll pull out my new arch-top guitar and we’ll play some western swing together in the key of Danny Gatton was definitely my inspiration in bringing ringing rockabilly forth in this course. We’re going to look at a rockabilly track in the key of E. Chicken pickin’ can be used in other genres outside of country. So, we’re going to look at a blues track in the key of B. Getting in the jam with guys like Sammy Hagar and Steve Vai certainly showed me you can use chicken pickin’ in hard rock, so we’re going to do a hard rock track in the key of A. We’re going to look at a funky track in the key of C, where we are going to combine chicken pickin’ with blues, rock licks, and a whole bunch of other great stuff. And, we are defiantly going to take a look at modern country, which is where we combine chicken pickin’ licks with a bit of edgy rock tone to it. So we are going to end the band section with a country rock track in the key of C.
Everything will be transcribed, tabbed and notated and you will also get the short and long versions of the band tracks so you can have just as much fun as your heart desires. We’ll enough talking folks, its time to throw on your cowboy hats, put on your boots on, grab your axes cause it is time to have some fun.
Section one is going to be a whole lot of fun, where you are going to get to learn what chicken pickin’ guitar really is and learn about all the elements that make that up. Everything from double stops to open string licks to steel guitar bends, different scale patterns, exercises, warm ups. Get ready for the learning part of the TrueFire course and I hope you have a blast!
One thing that guitar players never really talk about is how to stretch and prepare to actually play their guitar. This is something I feel is very important to cover, because for years and years I did not ever stretch. So I felt it necessary and I want to show you what I do when I’m warming up. The first thing is try to make sure that you don’t wear a big clunky watch. I’m a huge Invicta watch fan. This is an Invicta Venom and it’s a heavy watch. I try to take off my watch before I play.
Now, we are going to hold our hands and squeeze and wake them up a little. Then I stick one arm out in front of me and grab my fingers (as they are out straight) and pull down. You can feel all the muscles in the forearm stretch a bit and it should feel very good. If you are in pain then you have more stretching to do, so just hold it there a minute. Then pull your fingers back towards you. Those are two stretching exercises that I love to do. Trust me, if you have ever experienced trigger fingers or anything that could go wrong with your fingers and you realize that it could have been prevented with just a simple thing like stretching (which you failed to do over the years) it becomes a very important thing. I hope you take my advice and stretch. The other thing I like to do is hold my arm out and squeeze on the forearm (you’ll feel your hand want to come in towards you). What you want to do is just is flex your fingers every time you push in on your forearm. This helps move all the tendons and gets everything in your hands moving. I do this before every show. Just do this until it starts to feel good and your arms start to loosen up a bit. A lot of people crack their fingers, but I don’t recommend doing that – something it does just happen naturally.
Now that we’ve stretched, it’s time we grab the guitar!
Now we are going to talk about some warm up exercises we do on the guitar. Before each show I like to do this exercise and I hope you enjoy this. It gets all your fingers moving and lets them know you are about to play a fun gig. We are going to start by placing all four fingers on the fret board, starting with the first finger on the first fret and we are going to walk down every string using all four fingers.
Now, once we hit the fourth fret we are going to slide up to the fifth fret and walk back down again. We are going to keep doing this all the way up until the G note, which is way up on the 15th fret of the high E string. I don’t do this with an amp on; usually I do this standing off the stage waiting to go on. I am more of a three-finger style player and most people have always wondered why. I want you do know, when I was coming back down the scale you saw me using three fingers instead of four. Sometimes you’ll see me break into that because when I was a young boy my dad always had me wear a slide on my pinky finger. I know a lot of guys usually wear slide on their third finger, but I wear mine on my pinky. So I became a three finger player because of the slide. I know that sounds a little weird, but it has worked for me over the years. We all pick up things that work well for us and it might not be necessary correct, but if it works for you… so be it. If you are a three-finger player like me – yeehaw - Let’s rock on! But if you are not, don’t worry about it, just use all four fingers and make sure you do it properly. What I can tell you from a standpoint of warming up, make sure that every note is clean and clear. If it is not, you have to make yourself go back and start that scale over again. I don’t know if you can hear this (I’m going to turn this down kinda low) but I would actually get it up to speed like this.
Now, you keep moving up so when you get back down to the second fret, go up to the third. And so on and so forth. You work all the way down to the high G note and then work back down. Again, the most important thing to know with this whole video is to remember cleanliness is everything. Notes are precious on the guitar and you don’t want to waste a note. It’s the most important thing to me and it should be to you.
Another exercise I use for my hybrid style of pickin’ and as a warm up exercise. I’m going to combine these two because it is essential and something I use to warm up. Now, I have two fake fingernails on my right hand. I have acrylic nails and I go to a nail salon to get these done. It’s funny since all the old ladies and I get to know each other on a first name basis and I get to know when all their husbands go out fishing – it works out nice. And the long fingernails are also great for scratching the wife’s back.
But, I use the hybrid style of pickin’ where I use a flat Dava pick, which are great rubber coated picks. So, I use a flat pick and pull up with my fingernails and that is what gives you the chicken pickin’ tone. When you pull up you can do the kinda chicken thing… when you are pulling the note. That is why I use these nails. The hybrid style of pickin’ is a lot of fun and I hope that if you haven’t tried it that you just give it a go. I think you’ll have a lot of fun with it.
There is an exercise that I warm up with that I want to show you for people just getting into the hybrid style. It goes like this… it’s going to work all 4 fingers on the left hand and the hybrid style on the right hand. What we are going to be doing is a hammer on pull-off, where you hammer-on and pull-off at the same time. You are going to start on the 4th fret on the low E, hammer-on to the 5th fret and use the finger on the right hand to pull on the A string. D string gets the pick, G string gets the fingernail, B string gets the pick, and then the fingernail gets the high E. What I like to do is coming back down; we will use the flat pick all the way back down. Now we will go to the first finger and third finger. We are on the 4th fret and the 6th fret and we are going to work all the way down again. Sometimes I will still use the middle finger on the right hand with the fingernail to go down again or if you want to be daring with the hybrid style you can play this section with your ring finger. I’m going to go ahead and use the middle finger and do it this way. Then you do 1 and 4. Then you use 2 and 4, so now you are on the 5th and 7th fret. If you really want to get daring, you can use the 3rd and 4th finger, which is very hard to do. With me being a 3-finger player, I avoid that. But if you want to try it you’re welcome to – yes, I did it! You can do it too, just practice, it is fun. That’s what it is all about – having fun. But you got to warm up properly, it is very important. If you run through this scale, and again I usually do this on the side of the stage waiting to preform or if I am backstage with a small practice amp I will run through these scales. So if I turn it down and I do it up to speed, it will sound like this.
What I am doing is warming up each finger on the left hand and incorporating the hybrid style on the right hand. This builds up my speed and builds up clarity with each note I am picking with my right hand. It is a fun exercise and will help you if you are just getting into the hybrid style. Use this exercise and I think you will find it will help.
Now, let me clarify exactly what chicken picking really is. Chicken pickin’ is a term I use pretty much for the way I live, not only just how I play. I'm a good old country boy from the state of Maine and have been in Nashville 20 years. When you put on a cowboy hat like I am wearing, a beautiful Atwood hat, from all the way to the top of your Atwood cowboy hat to the tip of your cowboy boots. If you are going to put those things on top be who you are as a guitar player, that right there speaks volumes to the fact that you will be a country player and that you love country music and of course, I say the start of what makes chicken pickin’ what it is that you have a strong love for traditional country music and I always have. Now, let’s get into the technical side of what makes chicken pickin’ what it is. There is what you call your chicken pickin’ rig, which is important to have and we’ll talk about that later. Chicken pickin’ itself is where you incorporate the hybrid style of picking with s certain type of tone to emulate almost what a chicken would do, where you are plucking the string you’re not just attacking the string like if you were playing blues or rock or any other style. You’re not really going to be able to chicken pick fully unless you have on fingernails like I do so you can really pluck and pull on the string. I really think that is where I think the term came from. If you look back in history there are guys like Mr. James Burton who played with Elvis, but he also played on all the early Ricky Nelson stuff, Hello Mary-Loo and he played on Marl Haggard’s Working Man Blues, which is one of my favorite songs. I know every country guitar player loves that song. James was capturing that chicken pickin’ sound.
Let’s talk about the sound itself. It’s like a chicken plucking or chicken picking. What we are going to do is hold the pick naturally. Some guys prefer the thumb pick, but I prefer a flat pick and to use the middle finger and ring finger on my right hand. What you are doing is the flat pick is hitting the first note, and you are pulling with your fingernails underneath the pick, which makes it sound like a chicken creeping up on you. I think it’s a really hard thing to explain what chicken pickin’ is, because I think it is more of a life style thing and the form of music that you love, meaning traditional country. When you become a guitar player and you have a passion for playing guitar and you find that you gravitate toward country music as a guitar player. Now, I do love to play all kinds of genres of music, but I don’t take wearing a cowboy hat and cowboy boots for granted. It’s who I am and what I am, and when I put on a guitar and walk out on stage I feel proud to be what I am. Every guitar player has to have that kind of confidence when you play. When I walk out there and create that chicken pickin’ sound when I’m plucking the stings with the fingernails, I find that is very important to do. You can incorporate that in rock and in western swing and jazz playing and you can add those elements of where you chicken pickin’ in your blues player, absolutely. We are going to talk a whole bunch about that in this course. If you want to be a chicken picker, don’t be afraid to put on a beautiful Atwood cowboy hat, if you like. I’m wearing some Ariat boots; you can find any boots you want. When you put those on, it changes who you are as a person and sets the stage for what you are about to do when you grab the guitar. Have fun in this course and you’ll get a real taste of what chicken pickin’ is all about and how all the chicken pickin’ parts melds together with all the genres of music. At the end of the day it’s all about having fun and playing guitar. One of the reasons I love chicken pickin’ guitar is because it is a happy style of playing guitar. You can play light and it can be real bouncy feeling. I love train beats and I love the things that make country music what it is. Chicken pickin’ is actually a form of what makes traditional country music what it is. They still use elements of chicken picking in today’s country music but it’s growing to be a thing of the past in some cases. But I will be the one out there keeping chicken pickin’ alive because all my favorite guitar players did it like Don Rich, Roy Nichols, James Burton, Albert Lee, Ricky Skaggs, Steve Wariner, Vince Gil, Brad Paisley, Jimmy Bryant, Danny Gatton and the list goes on and on. There are so many more out there that have paved the way for me to do what I do and I am very blessed to be bringing this course on chicken pickin’. Have some fun with me – I know you will.
When you are playing on the fret board make sure you have a focal point to look at. I was born in a small town in rural Main, called Baileyville. I was born with an eye disease called Nystagmus and I am actually legally blind. When I started playing guitar, I learned by playing off the CD deck in my bedroom or off my tape deck. I had to figure out how I was able to maintain a focal point on the fret board so I wasn’t scared of the fret board as a whole. I came up with a scale pattern that I use in most cases and I would like to teach that to you. I don’t really show a lot of students this, so it’s something just for you guys and really will benefit you in the long run.
I like to just pick a key, and I don’t care which one, but for an example let’s pick D because it is midway down the fret board. I like to use my D, G and B string to focus my attention on in D, because if I slide that then that is my D position on the D, G and B string and a bar chord formation. So how did I find that? Well, here is the D chord and slide down and there is my D, 7th fret just the bar chord. Now, what I found was it was important that I learn my major scales in D around that bar chord. And what I’ve done is come up with a focal point scale that sounds like this. This can be a lick that you use or you can look at it like a scale. I like to use it in my pile of licks. The other important thing about this scale is the fact that it can be a lick or a scale. There are chords all around this and as a lead guitar player you don’t want to play the same cowboy chords that the rhythm guitar player is playing. So it’s important to find chords about that bar. I was able to do that this way. First in the D position, I have a four chord right next to that, so that’s my G chord. Now I can slide that up two frets and have an A. Or I have my A position right here, which is right next to that D bar chord. I also have some cool chords in a D pattern: bvii, vi, vim, V, vim, bvii, IV. Then I have different triads. I have a V triad. A V chord is actually an A in a D format or D configuration. A IV chord would be the G. I explain it this way because this is what we refer to as the Nashville number system. Let’s get back to the D bar chord. Here is what we can do with all these different chords. I can play some Doobie Brothers style rhythm all within this bar chord. I’m just dropping my 3rd finger from the 2nd note of the major scale (which is the E note) and then up to the F#. Then I have my vim right underneath that. Here is my D sus2. There is a chord, I’ve used a lot. I don’t know the name of it but it sounds good and it works. I have a sus IV here, and dropping back to my Major third on my B string back to the 7th fret. Everything is right here and why I look at this as a focal point scale. People say, I don’t like to play in Eb or Bb or they have chords they are scared of. With this kind of thing there is no worry. All you have to know is where that bar chord is. For example, Eb would just be one half step up and you’d have the same scale. What I am doing to make that scale happen is stating on the 2nd note and chromatically walking to the 3rd. The rest of it is from the 5 note to the 6, avoiding the 7th note and playing the basic root again to the 2nd note of the scale, Major 3rd. When I go from the 3rd note, I chromatically walk up to the 5th… iii, IV, bV, V, vi, and walk up again bvii, Major vii, and root. That makes up the whole scale. I played that in Eb, but you can play that in an key you want. For example, you are scared of Bb. Play a Bb chord, find out where your bar is – on the 3rd fret, so you can use that same scale. You have all the chords available that I played in D, just in Bb. There is the IV, viiM, V. You have the availability and access to chords and thinking differently and sounding different then the acoustic guitar player or rhythm player in your band. This enables you to open your mind to think of what licks I want to play now. It’s very important to have a focal scale and I hope this helps you find yours.
Let’s talk about a really cool aspect of chicken pickin’. They also use this in blues grass music and other genres. I want you to use it for every genre of music. It’s called open string licks. We’ll start with open string licks in the key of E. E is a fun chord and is pretty open anyways and one of the first chords you’ll learn on a guitar. Let’s start by utilizing all six strings. Using these open string licks, I’m going to show you first, is what I call the pick pick pull pattern with the right hand. You are actually going to pick pick pull on the third string. We are going to start with our 3rd finger on the 4th fret (low E string). Our 1st finger on the 2nd fret (A string) and then have an open D under that. Again, pick pick pull. We are going to do the same thing with the same fingerings on the A and the D string with the open G. 3rd finger on the 4th fret (A); 1st finger on the 2nd fret (D string) with an open G. Now, we will slide up a fret. Our 3rd finger will be on the 5th fret (D string), our first finger on the 3rd fret (G string) with an open B. Yes that does sound a little despondent, but it will work. We are going to slide up again one more fret. We will have our 3rd finger on the 6th fret (G string) our first finger on the 4th fret (B string) with an open E. I am explaining this so it sounds like it is played in thirds, but you don’t want to play it that way. It should be played together to flow like a waterfall. Now, I will play this at full speed and we will slow it way down. That is the first open string E lick. It’s a lot of fun and has a cool vibe to it.
Now, we’ll do one that is easy to play and connects to the first one. Everything is on the 7th and 4th fret. With the same pick pick pull pattern. We’ll start on the 7th fret, with our 4th finger on the low E, the 1st finger on the 4th fret (A string) with an open D under that. Do the same thing on the A and D string with an open G. Carry that down to the D and G string with and open B. Then on the G and B with an open E. What I’m doing is putting a little rockabilly rhythm behind this so we can keep in time. I’m going to play this in full speed and then play it a couple times really slow.
If you want to get a little daring, you can add the first one to the second one. Now, I want to show you one that I came up with. Experimentation is key with open string licks. I’ve written a few songs, one on my newest album called All Fire Up with Shrapnel Records called Minor Adjustment. A lot of those open string licks I found on my own my experiment. Have fun, open up and rip. If you hit a bad note, no one will really know it except for you. Now, I will show you this one I just came up with. It connects to the first and second one. What I am doing is using the 3rd finger (you can use your 4th finger if you like) but I prefer my 3rd. I’m using my 3rd finger on the 12th fret (low E) and using my 1st finger on the 9th fret (A) with an open D under that. We are going to go 11th and 9th all the way down. It’s 11th on the A, 9th with the 1st finger, 9th fret with an open G under that (I know it sound real dissident but it will sound good altogether). We will move down again, 11th fret on the D string, 9th fret on the G with an open B under that. Doing it again, 11th fret (G), 9th fret (B) with an open E under that. As we drone that open E we are going to hammer-on with the 3rd finger to the 12th fret, B and E and hit a low note on the bottom. I prefer to use all three of the open E licks to end a rockabilly song. I’ll show you how to do that after we practice this a few times through. Here is the lick at full speed and slowed down. You can hear where you can place the B and E hammer-on in different spots; just use your personal preference for that.
That’s a fun one and sounds dissident when played slowly, but when you put all three of these together it is really cool sounding. You can end a rockabilly song with this or just have fun. Combine the first and second one or the second and third one or you can play them individually. The key is when using the open string scales is to have fun and keep a nice and bouncy feeling.
Matthew Lee is a great session and club player whose licks should be copied and played over and over again
K
KenMarshall
Verified buyer
12/09/25
Excellent masterclass in this style
I play a few different styles on guitar from jazz to country via blues and folk. This Johnny Hilland course is a masterclass in this style and I have already incorporated some bits into my everyday playing. He is clear in his instruction and helps you understand from the ground up rather than just a bunch of licks. Excellent
C
cfearn
Verified buyer
06/28/25
Can't beat it
Great course for learning
N
Nate L.
Verified buyer
04/07/25
Awesome!
Very informative and thorough course. Johnny is one of the best!
D
DLerat
09/06/23
Excellent
A must have for country licks. And I love the rockabilly and swing performances. Awesome! A pity that there are so many mistakes in the tab transcriptions...