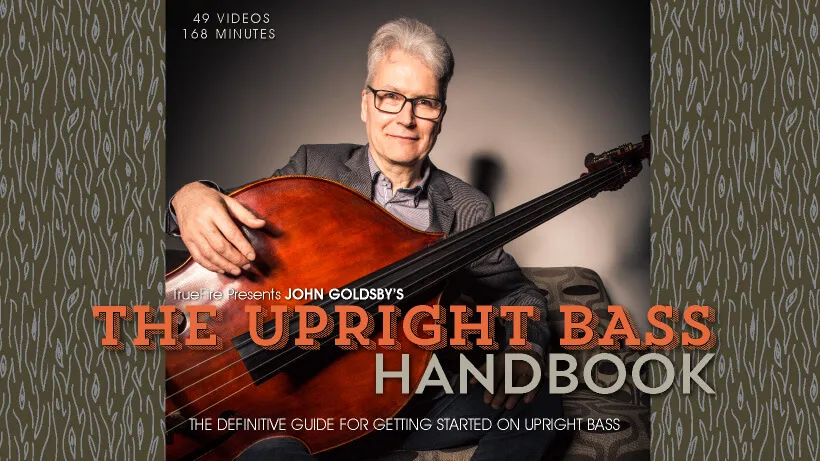
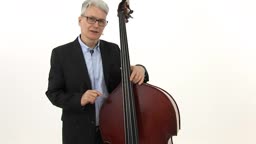
The upright bass is the granddaddy of all bass instruments, which offers the player an organic, tactile experience that no other instrument provides. Electric bass players and guitarists can will expand their sonic arsenal by learning to apply what they already know to the upright bass with John Goldsby’s definitive course of study, The Upright Bass Handbook.
Recording artist, composer, bandleader, master bassist, and consummate educator John Goldsby has a pedigree that would take the entire page to fill. John has played and/or recorded with some of the legends of jazz including Jimmy Raney, Helen Humes, Jamey Aebersold, Buddy Tate, Barney Kessel, Dave Liebman, Buddy DeFranco, Scott Hamilton, Michael Brecker, Mel Lewis, Toshiko Akyoshi, and John Lewis to name just a few. We’re very proud and excited to welcome John to the family with his first TrueFire course, The Upright Bass Handbook.
”If you know how to play a solid walking bassline, everyone will want to jam with you! I've organized the course into four sections: In the first section, we'll learn about the parts of the bass and how to properly hold and handle the instrument. Then in the second section, you'll develop your left and right hand technique, while learning how to find notes on the fingerboard and tune the bass. In the third section, I'll get you up and playing your first basslines on the upright.
In the fourth section, we'll dig into ten more essential studies focusing on the fundamental approaches for playing walking basslines on the upright. For each of the studies, I’ve broken the basslines up into several focused exercises that will help you build your technique step by step. I’ll give you a detailed demonstration and then we’ll play each of the basslines together first at a slow tempo and then a bit faster.”
Section 1: Essential Concepts - In the first section, John presents several essential concepts that you should be aware of if you want to play the double bass in a jazz situation. You'll learn different names for the instrument, the parts of the bass, and how to handle and hold the bass.
Section 2: Basic Techniques - In this section, John shows you basic upright bass technique, starting with where to put your right hand, and how to get a good sound. You'll learn how to get a big, warm, flowing sound, first on open strings. You'll also learn how to mute strings to articulate solid, clear rhythms. Then you'll move on to the left hand and look at some important landmarks on the bass. Finally, you'll look at notes and left hand fingerings in the half and first position. These are the "money notes" at the low end of the bass. Key Lesson Sets in this section: Basic Right Hand Technique, Open-String Technique & Exercises, Where Are The Notes?, Tuning The Bass, and Basic Left Hand Technique.
Section 3: Let's Play! - In this section John will guide you through playing some basic tracks using the open D and the high D on the G string (. Be sure to take these exercises slowly, focus on finding the high D, and play in time with a strong sound. Be aware of getting in the groove of the track, and place your notes right "in the pocket" with the drummer.
Section 4: Walking Bass Studies - This section presents 10 essential studies that demonstrate all the nuts and bolts of constructing walking basslines, show you how to find the notes on the fingerboard, and how to move in and out of the half and first position. Walking basslines are an integral part of traditional jazz playing, as well as some types of R&B and country. Key Lesson Sets in this section: Roots On The Downbeats, Upper Leading Tones, Arpeggios & Leading Tones, Scales & Leading Tones, Mixing It Up, Blues Forever: Rhythm Embellishments, Blues Forever: Melody, Two-Beat & 4/4, and Rhythm Changes Forever.
John demonstrates all of the key examples and performance studies over live-band backing tracks and then breaks them down by stepping you through the key concepts, techniques and creative approaches that he used in the playing examples.
All of the key examples and performances are tabbed and notated for your practice, reference and study purposes. Plus, John generously includes all of the backing tracks for you to work with on your own.
Alright, grab your dog house, and let’s dig in with John Goldsby!
What you'll learn
Understand how to construct bass lines using arpeggios
Hi, I'm John Goldsby and welcome to The Upright Bass Handbook. The upright bass is the granddaddy of all bass instruments and offers the player an organic, tactile experience that no other instrument provides. Electric bass players and guitarists can expand their sonic arsenal and musical options by learning to apply what they already know to the upright bass.
I've organized the course into four sections: In the first section, we'll learn about the parts of the bass and how to properly hold and handle the instrument. Then in the second section you'll develop your left and right hand technique, while learning how to find notes on the fingerboard and tune the bass. In the third section, I'll get you up and playing your first basslines on the upright. And in the fourth section, we'll dig into ten more essential studies focusing on the fundamental approaches for playing walking basslines on the upright.
For each of the studies, I've broken the basslines up into several focused exercises that will help you build your technique step by step. I'll give you a detailed demonstration and then we'll play each of the basslines together first at a slow tempo and then a bit faster. And as always, you'll get standard notation including all necessary fingerings plus all of the live-band rhythm tracks to work with on your own. Alright, grab your dog house, and let’s get started!
In the first section, we'll review several essential concepts that you should be aware of if you want to play the double bass in a jazz situation. You'll learn different names for this instrument, the parts of the bass, and how to handle and hold the bass. I'll even show you how to take the cover on and off!
So what's this thing called? There are a lot of names for this instrument: upright bass, double bass, string bass, bass viol, bass violin, contrabass, bass fiddle, bull fiddle, acoustic bass, standup bass, doghouse . . . the tree . . .but I prefer to call it a double bass--like its name in the orchestra--or if I'm also switching back and forth on electric bass guitar, I might refer to this instrument as the acoustic bass. It's convenient if you're doubling on both instruments to think "electric or acoustic." Upright bass is also a common name for this instrument, as in "The Upright Bass Handbook."
Let's look at the parts of the bass:
Scroll: Starting with possibly the least important part of the instrument; at the top of the bass, we see the scroll. The scroll is ornamental, but a nicely-carved scroll shows that care went into building the instrument.
Peg Box: At the top of the bass, the strings go into the peg box, and they're wound around the tuning machine posts.
Tuning Keys: The tuning pegs might also be called tuning keys, or tuning machines. These are similar to what you see on an electric bass.
Nut: The nut sits at the top end of the fingerboard. This is a small piece of hardwood, like ebony. The strings travel through slots cut into the nut. It's important to have a nut that that is cut to keep the strings comfortably low, but not so low that they buzz.
Neck: The neck is usually made of maple or some kind of hard wood. The neck is fitted and glued into the body of the bass with animal hide glue. Double bass luthiers never use any kind of white or permanent bonding glue.
Fingerboard: The fingerboard is glued onto the neck with animal hide glue. The fingerboard is planed with a slight contour or concave relief, so the strings don't buzz.
Heel of the Neck: The heel of the neck is an important landmark on the double bass. This is where the bottom of the neck flames at the point where it attaches to the body of the bass. This landmark can help you find the notes in the middle of the neck and the notes going into the high positions.
Top/Table: The top of the bass--sometimes called the table or belly--is where most of the sound is produced. The top is defined by the shoulders, the bouts--the upper bout, the C bout, and the lower bout--and the F-holes. The F-holes allow sound to emanate from the body of the instrument. A microphone to amplify or record the bass is best not placed directly in front of the F-hole. Put a microphone in front of the bridge, or towards the foot of the bridge.
Bridge: The bridge is another important sound-producing component of the bass. The bridge holds the strings, and transmits sound from the strings to the body of the instrument. Many bridges have adjusters built in, so you can easily change the string height above the fingerboard. I usually keep my strings at about 7 millimeters on the G string, 9 millimeters on the E string, measured from the end of the fingerboard to the bottom side of the string. Most pickup systems take their signal from the bridge. Some clamp onto the bridge, go under the feet of the bridge, are built into the bridge adjusters, or are built into the bridge. Most pickups (transducers) will attach to the bridge of the bass, and connect to an amplifier to make the acoustic sound of the bass louder.
Mensur/String Length: The string length (also called the mensur) is the measurement between the nut and the bridge--the length of the vibrating part of the string. Most double basses have a string length of between 40"-42" (ca. 102-108 cm). Compare that to the typical electric bass with its string length of 34" (ca/ 86 cm)!
Tailpiece: The tailpiece holds the strings to the bottom of the bass. The tailpiece is anchored with an endpin wire or tailpiece wire, which travels over the saddle at the bottom of the bass.
Endpin: The endpin is usually adjustable, so you can put the bass at the correct height for your size. Experiment with the endpin height in order to find a good playing position for your body type. Remember that the nut at the top of the fingerboard should be about at your eye level.
Inside the Bass: The top is supported inside the bass on the E-string side with a bass bar, and on the G-string side with a soundpost. There are braces inside the bass for extra structural support.
Soundpost: The soundpost is another extremely important sound-transmitting component. The soundpost is positioned inside the bass, between the top of the back, just near the foot of the bridge on the G-string side. The soundpost transmits sound from the top of the bass to the back, and can be adjusted for different sound qualities. You should have your soundpost setup by a professional luthier. If you ever change your bass strings, only change one string at a time, otherwise your soundpost might drop inside the bass!
Braces: Inside the bass, there are usually braces strengthening the back of the instrument. The whole instrument is glued together with animal hide glue. If you have problems or questions about the setup of your bass, go to a professional violin or bass shop. A well set up instrument will make all the difference in your sound and in your ability to get around the bass.
Bass Bar: The bass bar is an important piece of wood inside the body of the instrument, attached to the top. You can see a small part of the bass bar if you look inside the F-hole on the E-string side. The bass bar runs the length of the top, and is meticulously fitted to the shape of the top. This piece of wood helps support the top on the E-string side (the soundpost sits on the G-string side) and transmit sound from the bridge through the top of the instrument.
There are two ways to hold the double bass: sitting or standing. In this video course, I'm going to address standing with the bass, and give you some basic ideas about balance, positioning, and moving around the instrument. The back of the top inside bout should rest just inside your hip bone. This resting point, balanced with some light guidance with your left hand (especially your left hand thumb) is all you need to keep the bass in position and anchored securely.
Another important position to check is the height of the bass. I like to have the nut, at the top of the fingerboard, right at my eye level. This lets me play in the lower positions without raising my shoulder too high, and also allows me to move into the higher positions easily. My right hand is at the perfect plucking position at the end of the fingerboard. I see some bassists with their basses higher or lower than this, but in my experience, this is the place to start--with the nut at eye level. The bass is a large instrument, but you should not strain too much to play it. You should play with energy, but play with low stress. When I have the bass resting inside my hip, I can balance the instrument even without my left hand. Sometimes I'll put my left knee on the back of the bass for extra support and balance, but my general playing position is with my weight evenly distributed on both legs.
When I shift positions, my left hand can freely move up and down the neck, even into the high register (what's called the thumb position). You should be able to move your left hand freely, sometimes adjusting the angle of the bass by slightly moving your hips.
My last piece of advice here is to get a full-length mirror and practice in front of it You should look relaxed, and your movements should be relaxed, yet precise. Remember that the motion makes the music. You should be able to hold the bass securely with a minimum of effort, and glide over the instrument to get to any note that you need to play.
It's important to learn the simple, small techniques that combine to make good, solid, complete bass technique. Great bass technique is simply a lot of simple techniques working together in an interdependent package. Every complicated technique, hot lick, incredible bassline, or killer solo can be analyzed as a series of simple techniques that have been practiced to perfection.
In this section, we'll look at basic upright bass technique, starting with where to put your right hand, and how to get a good sound. Your sound is the first thing people hear, so it's important to spend time with right-hand technique. We'll learn how to get a big, warm, flowing sound, first on open strings. We'll also learn how to mute strings to articulate solid, clear rhythms. Then we'll move on to the left hand and look at some important landmarks on the bass.
Since the upright bass has no frets like the electric bass guitar, we need to orient our left-hand movements according to physical landmarks on the instrument and strings. We'll also learn how to tune the instrument using harmonics.
Finally, we'll look at notes and left hand fingerings in the half and first position. These are the "money notes" at the low end of the bass. Another major difference between the upright bass and the bass guitar is the left-hand fingering system. On the upright bass, you need to use the classic "Simandl" left-hand fingering system: 1, 2, 4. Once you've learned the fingerings for the notes at the low end of the bass, you'll be ready to jump in and make some music!
The thumb of your right hand should be lightly anchored on the edge of the fingerboard, towards the bottom end of the fingerboard. This position allows you to pivot with your right hand and pluck notes on all four strings with equal momentum.
I think of plucking the bass with the right hand as a motion generated from the wrist and fingers. Any wrist motion starts with the upper arm and shoulder, but those are big muscles. For the delicate task of playing pizzicato--plucking the string in other words--we need to use the fine motor skills of the wrist and hand. I can pluck the string with one finger, my index finger. Or, I can use two fingers together in tandem to pluck one note. Or, I can alternate index and middle fingers to play faster passages or rhythmic embellishments. More about those techniques later.
When I'm walking quarter notes, I'll usually play with my right-hand index finger. I think of striking through the string. I believe that a big sound and good tone comes from the speed that your finger travels through the string. I don't pull the string and let it snap, rather I strike through the string in rhythm. This gets a strong attack and a long sustain. This motion starts with the wrist, and follows with the finger playing through the string. I like to compare this motion to dribbling a basketball or like a drummer's stick hitting a ride cymbal in a repetitive rhythm.
It's also helpful to think of using my right hand index finger in a small circular motion to pluck the string. The slower the tempo, the larger the circular motion. The faster the tempo, the smaller the circular motion. My right hand motion is in time, and the motion determines the sound and the groove.
Now here's a disclaimer: If you see ten different bass players, you'll see ten different ways of plucking the string. I think you should experiment with the techniques that I'm showing you, and use your ears to tell you what sounds and feels the best. Everybody's body is different; we all have different physical profiles that we deal with when we play the bass. The various types and sizes of double basses also might require different techniques. You're the ultimate judge of which of these techniques is for you by using your ears.
Now it's your turn! Play some open strings and listen to the sound. Try to get a flowing motion with your right hand, and pluck each string over and over and let it ring. Sounds good, doesn't it? Let's move on to some open string exercises in the next lesson.
In this exercise, we'll concentrate on playing open strings. We'll go through five exercises that lay the foundation for getting a good sound.
To get a good, strong pizzicato sound on the bass, you need to use a bit of snap from your right hand wrist and finger. Get some of the meat of your right hand index finger on the string. Pluck through the string, moving your index finger down into the fingerboard. Focus on striking through the string. when your finger moves through the string, you should get on and off the string fast. Play through the string with a fluid motion, first out-of-time, and then in time.
I visualize a small circular motion with the right hand index finger. The slower the tempo, the larger the circle. The faster the tempo, the smaller the circle. Remember that the motion will make the sound. A strong, smooth, rhythmic motion will create a strong, smooth, rhythmic sound. When you play an open string, sometimes you need to mute the string with your right or left hand, in order to play the correct note length, or to move to a different string without the first string ringing too long. You can mute an open string with your left hand finger by lightly touching the string as it's ringing.
Play each exercise as slowly as you need to, or even out of time at first. Then practice the exercises in time at a slow tempo to get the feeling of plucking the string with your left hand index finger, then muting the string with your left hand. There are also situations where you'll mute the string with your right hand. Sometimes, either right or left hand can be used to mute a ringing string.
I’m currently in the middle of John Goldsby’s double bass course, and it has already proven to be an excellent learning experience. The lessons are well-structured and easy to follow, with plenty of practical tips that are especially valuable for new bassists.
Even halfway through, I can already see progress in my playing and a stronger understanding of the instrument. The course is not only pedagogical and inspiring, but also very reasonably priced – truly great value for money.
I highly recommend it to anyone starting out on the double bass or looking for structured, professional guidance.
P
Pursuitee
Verified buyer
04/14/25
I am enjoying this course very mushroom I am learning a lot!
D
DavidsonB1
Verified buyer
04/13/25
Good Place to Start
Been wanting to try the upright bass for a while. I saw this ebook and decided to give it a go. It's a great place to start your learning and get up and running.
D
Dave
09/30/24
Excellent intro to walking
Goldsby is an excellent teacher and bassist. This course is valuable for bass guitar as well.
R
Rex
04/01/22
The Upright Bass Handbook
John Goldsby's "The Upright Bass Handbook" is a great introduction to the art and craft of playing the upright bass. Goldsby's demonstrations and explanations are clear, to the point and insightful.
A wealthy collection of lessons give solid guidance and plenty of material to keep you busy in the 'shed for many hours.
Even though I pretty much play only electric, I picked up a lot that applies and is relevant for any bass player.
Goldsby cuts to the chase and his lessons not only help to demystify the subject matter, but more importantly inspire and motivate one to keep learning.
Thanks Truefire for producing and making this this course available.
Cheers, all!