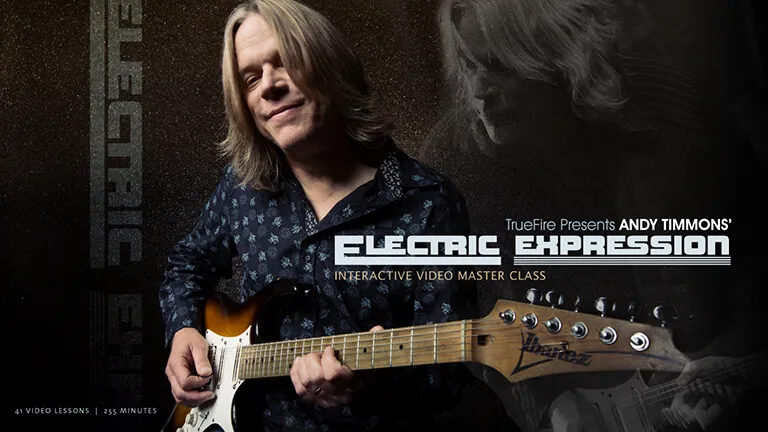
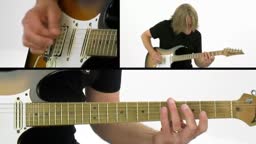
Electric Expression

A masterclass with Andy Timmons.

Marty FriedmanTommy EmmanuelSteve VaiEric GalesEric Johnson

Get this course and 1,000+ more with All Access

Try 14 days free. Cancel any time.

Purchase Individual Course for $24.99
Electric Expression

About this course

The music universe is blessed with so many truly gifted guitarists. There are amazing performing guitarists, highly sought-after session guitarists, successful solo-recording guitarists, rock star guitarists, master educator guitarists, guitarist’s guitarists, and then there’s Andy Timmons — all of the above.

Andy is the consummate guitarist. He’s done it all and he continues to do so. If you were lucky enough to see him live in Danger Danger, he blew your mind. His highly acclaimed session work and solo recording projects speak for themselves. He’s served as Olivia Newton John’s musical director for many, many tours. He’s an international rock star.

Most impressive of all? Ask any top guitarist to name five of their own favorite players and Andy’s name will make every list.

You’re in for a treat because Andy is also one of the most naturally talented educators that we’ve ever had the pleasure of working with, and we’ve worked with a lot. We’re thrilled to welcome Andy to the TrueFire family with the launch of his first interactive video course, Electric Expression!
"Andy Timmons has proven again why his name is on top of the guitar legends list. I have been a fan of Andy for many years and it was this video that made me a TrueFire member. Andy not only covers the basics of playing here but more important, covers how he thinks about playing; his thoughts in how he plays, such as his way of doing pitch harmonics. For any guitar player this is well worth the time, money and effort." - Tim Higgins, TrueFire Student
Whatever style you play, and whatever level you play at, you’ll find something of significant musical value for you within Andy’s Electric Expression curriculum. In fact, we suggest you just sit back and watch the entire course before you even pick up your guitar. Then go ahead, plug in and dive deep into this truly remarkable learning experience.

Andy’s organized the course into two main sections. In the first section, Essential Concepts, Andy presents 17 key concepts, techniques and approaches that he considers to be the essential building blocks for any contemporary electric guitarist: Focusing On The Third, Eliminating Blind Spots, Tension and Release, Hybrid Picking, Double Stops, Dynamics Within Soloing Lines, Arpeggios, Chromaticism, Vibrato, Bending, Playing Melodically, Horizontal vs Vertical Soloing, Tap Harmonics, Artificial (Pick) Harmonics, Ornamentation, Time and Feel, Phrasing and Motivic Development. Andy also presents a Rig Rundown to show you his amp and pedals and how he dials in his tone.

In the second section, Performance Studies, Andy puts all 17 of the key concepts and techniques to work over a series of chord progressions and rhythm tracks that he cherry-picked from his previous recordings for this project: Electric Gypsy Progression, Cry For You Progressions, Carpe Diem Progression, Farmer Sez Progression, and the A Night To Remember Progression.

After each performance, Andy steps you through the key concepts, techniques and creative approaches he used to improvise the solo in the performance study. It’s here where you’ll glean the most impactful insights for crafting interesting and engaging solos of your own. Andy’s goal here is just that — take what he passes on from his own mentors and learning experiences and help you make your own music.

All of the key demonstrations, performances and examples are tabbed and notated for your practice, reference and study purposes. You’ll also get Guitar Pro files so that you can loop and/or slow any section down as you work through the lessons. Plus, Andy generously includes all of the rhythm tracks for you to work with on your own.

Get Electric. Express yourself…

P.S. Every guitar player at TrueFire (and there’s lots of us) begged the studio for rough cuts of this course to work with at home. Then once the word got out that Andy did a TrueFire project, we received no less than 20 emails from Andy’s peer guitarists also asking for an advance copy, which they’d be happy to pay for. The studio correctly said “no” — students always get first dibs!

What you'll learn

  • Apply up-picking technique to extract harmonic overtones
  • Use open strings as drones while playing melodic lines
  • Play melodic lines over the verse progression of 'Cry For You'
  • Understand how to apply technical concepts in real musical situations
  • Learn to incorporate multiple techniques into improvisation
Release date: 10/01/2014 • 4h 19m runtime
Start Course
Sample lessons
Tension and Release
Tension and Release
Concept 3
Arpeggios: Triads and Beyond
Concept 7
Phrasing and Motivic Development
Concept 17
Electric Gypsy Progression
Performance

What's included

41 lessons • 22 charts • 12 Jam Tracks

Electric Expression
Hey everybody, this is Andy Timmons, and welcome to Electric Expression. I started playing guitar when I was 5 years old. I had a little toy plastic guitar, and I was playing one string melodies. My earliest musical memory was the instrumental section in the Beatles' song "I Saw Her Standing There". It was the flip-side of the "I Want to Hold Your Hand" 45. I didn't know it was a guitar solo, but the sound of that electric guitar drenched in reverb certainly set the tone for the rest of my life. From that point on, my life just seemed to be revolving around music. Every record my older brothers bought were electric guitar driven. That energy and that sound became my goal. I wanted to be able to learn how to make those sounds, how to play those notes and those chords, and be a part of that amazing energy.

I've organized this course into two separate sections. The first being 18 essential concepts, which are foundational building blocks that can help all of us, from beginner to advanced, and take your playing to the next level. We're going to cover everything from voice leading through chord tones to chromatic ideas, all the way to phrasing and motivic development. In the second section we're going to take everything we've learned from the first section and apply it in a musical situation over 6 different performance studies. After each performance I'm going to beak it down for you. I'm going to show you how to apply some of these concepts and how I'm plugging them into these musical situations. All of the key examples will be tabbed and notated for you plus you get the backing tracks to work with for all the examples so you can apply these ideas on your own. All right, enough talking. Grab your guitar. Let's plug in and play.
SECTION 1: Essential Concepts
In this first section we're highlighting essential concepts and some of the basic building blocks of how I play and some of the things that I consider important - Certainly note choice, time feel, and some chromatic ideas. All these different elements add up to developing how I've arrived at my style. Obviously, continually evolving, but that will help you come up with your own unique approach eventually. But it's always good to learn these essentials and have them help you grow. Let's get started with the first concept.
Focusing On The Third
We're going to take my song "Electric Gypsy" and use it as a vehicle to illustrate some of the ways that I think about songwriting and soloing. It contains several ideas that might be helpful to you in your own songwriting and your own melodic choice. I'm going to play the actual basic riff of the song and then talk a bit about some of the parts that it contains. The song is in the key of D major. So it's a melody contained in chordal work, which is something I love and something a lot of us were inspired by Jimi Hendrix. In fact, that's the inspiration of the title of that song. It was from a biography I was reading called "Electric Gypsy". I snagged it right from that, full disclosure folks. What's interesting about this melody is that it is largely based on the third of the chord. So if you just learn how to spell each chord, the first chord is D major, which contains the notes D, F#, and A. The F# being the third of that chord. So I've got an open string D and I played the melody on the G string. The F# is the important note of the chord that defines whether it's major or minor and to me that's the sweet note. The root is the tonic, very stable note, but not the most flavor, as well as the fifth, the A. The third gives you that flavor of major or minor. If it were D, that'd be a very sad song, not the same vibe, so we've got the F#. The next chord is A major, we've got A, C#, and E. That C# figures in largely to that melody. The next chord is B minor so I voice lead. You can see it in that B minor chord shape that you already probably know. I use the old Jimi Hendrix wrap around the neck to thumb, that low B note. The next chord is G major so it's just those four chords, D major, A major, B minor, to G major. This doesn't really contain the third, but it's just a nice little bluesy riff. But there it is, it contains some very important nuggets. From songwriting, my natural melodic ear wants to hear the third of that chord at some point in the bar that it's happening. There's a D major chord going on, if I'm writing a song. It's likely to be featured, or if I'm soloing that's the note that most defines to me and the listener what the harmony is, and it seems that all the players that I gravitated to were guys that really had a command of this.

Guys like Robben Ford, Larry Carlton, and Steve Lukather. But even before them, guys like Wes Montgomery, Pat Metheny, and Pat Martino. They were very adept. If there was no other instrumentation going on, just by listening to their lines, you would hear that harmony outline in some shape or form, and a lot of that's based on the third. Thinking of it in an improvisational way, you can utilize that idea by isolating the third of each chord. Sometimes it's easy to do that by visualizing the actual chord shape. I've come to realize after all these years how much I am guided by my ear and my eye too, because I can see in the chord shape, I know where that third is. There's the F#, so if I want to feature that over that chord and play it into the A major, there's the C#. That's the third B, D, F#, and G major. It's there if you're more familiar with that chord shape. You can make a little exercise out of that. As the chords go by you will hear the harmony go by, into a higher B for the third of that G chord. I'm going to improvise a little bit now, basically staying in a D major pentatonic, but also utilizing the thirds of those chords as they go by. See if you can hear the harmony as I'm improvising. I was utilizing some of that pentatonic that we all know. Looks like the same pentatonic as B minor, because that's the relative minor of D major and then adding those chord tones. Actually a very good exercise to just play the chords for a while. It's a great idea to work on rhythm playing, because it does help you visualize where some of these chord tones are, in addition to where your most basic scales would be formed around. So when I'm playing major pentatonic, I see that part of that triad as the basis - like the home. If you learned different chord shapes, of course there's probably the first D major you learned to A major to B minor or good old G major. This is playing the octave of where you were. That's like that D major form for the A. So many possibilities just being aware of the chords and how to spell a simple triad within those chords and voice leading with some of the thirds.
Eliminating Blind Spots
We're going to take my tune "Cry For You" and use it to show you just a few ideas that might help you expand on some of the things you already know and some pretty simple ideas that I think will lead you to some nice melodic ideas. Let me first talk about the chord structure of the basic melody, very simple. It's D minor, I guess D minor 7 if you look at the original riff, but you can consider it D minor, and then down to B flat for the major 7. So essentially D minor to B flat. As always, I will pare things down to the most simplest form. One idea might work over all the chords in this particular sequence and of course the D minor pentatonic is a go-to fan favorite of most guitarists. As I talked about previously, so many of these things are based on chord shapes that you already know, so I think the first couple of D minors that come to mind for most guitar players are the ones based with the root on the A string, or of course the tenth fret with the tonic on the low E string. There's the two D minors that I would base it off of, or maybe the open position as well. So I'm going to start with a D minor pentatonic and that's one basic position you may know, or I think this initial box position is what we all started with. With just those two positions and just the one scale there's a lifetime of music to make right there. You don't need to know anything else. It's an oversimplification, but it's really true. There's so much that can be done with just those five notes. It's just a matter of how they're played and what notes are played at what time. But obviously we like having a bit more to be able to do to help expand our melodic possibilities and what I like to do is blend those two positions together, and that's what I'm hoping to underscore here, is how to connect a couple of positions you already know and eliminate what I used to call blind spots. Before I really learned a lot about the guitar neck there was always a couple of positions I was most comfortable playing in. So the epiphany moment was when I realized how they just all connected together, and I didn't have to stay in a box. I could think more horizontally and so that's what I want to encourage you to work on in this particular segment, connecting those two positions, you can find ways of doing that. One of the things I like to do is to play things on one string and learn things that way. That way, you can play the pentatonic in the position and that's something that I grew to do a lot in a lot of my playing. I started gravitating towards that being a more vocal sound and if you're familiar with my music at all you'll realize that there's a lot of slippin' and slidin' and a lot of horizontal playing going on. There's nothing wrong with hearing but somehow this moves me a bit more. It's got a little bit more emotional content, more like a singer.

So try it on the A string and then visualize where that next chord is so you already start to see that you know that. I love that sound and you can try that on each string. If we reach out to the F and then play the D minor pentatonic on that D string you can use the open D string. Here I am at that open position D minor just up the octave. Of course I'm going to want to do it on every string. So go back to that chord position and a quick word about fingering. I'll do sliding generally with the first or third finger, but you have to figure out what's most comfortable for you. I'm never one to suggest that there's only one way you have to do it. Sometimes as an exercise I'll give the one finger exercise. Sometimes it's easier for players to visualize in that way. I might start out with the first finger and then go to the third finger, because I'll bend a lot into notes as well. I'll talk more about bending later. Why not on the B string as well? Start on that note F, you recognize that as the third from that D minor chord. You're already up to this position, just an octave from where we started the come-together bend. Now if you were only well-versed in those two positions and now you've really branched out over the whole guitar neck, and it's pretty easy that way. My epiphany was with Ted Nugent's "Strangle Hold", because I had the two positions in A minor pentatonic, and there was the bridge. There was that little epiphany that I can connect these two positions. Had I been a great practicer at that time I would've done it on all strings, but that was enough for a kid in his bedroom playing with his KISS and Ted Nugent records. So let's take the D minor on the E string, on the high E string. So I was descending on one string and then changing. Hopefully that will give you a little bit of inspiration to get rid of those blind spots. It's fun to be able to effortlessly blend those positions you already know, and then get into some of those phrasings where you're using more of a horizontal line. It's nice to slide from one note in the scale to an upper note.
Tension and Release
We're going to continue to use "Cry For You" as a springboard to talk about some other ideas and this concept is tension and release, this idea is everything about music. It's everything about life as well, when you think about everything melodically. If it's a chord tone, consider that home, but if it's not a chord tone, it's a tension tone and it's going to sound like it wants to go somewhere. "Cry For You" is the perfect example for this melodically because the melody is built on a tension tone set up over the D minor chord. If we study what that note actually is to the key and to the chord of D minor, it's the note E not a chord tone. It's the second scale degree, you might call it the ninth because the seventh is in the chord but it's the second scale degree. It's the E note and as we talked about before, there's that third of the chord, that's the note that really gives you the flavor of the chord, it gives you the emotion of that chord, so there's that tension. It wants to go somewhere it can resolve back down to the tonic note, the D. But that's where I release it right there on that F natural, which is the third of the D minor. The next chord is B flat major and that D is the third of the B flat so that's already home. Again, the reason I'm pointing this out is that the melody is going somewhere, it's not just static, there's a time and place for that as well. But music to me is emotional, it has direction, it has tension and release. This goes back to all the great classical composers that were the masters of this, from Bach to Beethoven. So, there's recommended listening but this is a much simpler form of it - that's the basic idea. If it's not a chord tone, it's going to be a tension tone, and it's going to want to go somewhere. So let's check out a couple of other tension tones. There's the ninth. It either wants to go up to a chord tone or down to a chord tone. That's as simple as that. So we just went up to that minor third. Now what if it had been the note G? Another good tension note, it's the fourth scale degree. So you've got root, second, third, fourth. If I were to land on that I want to hear it go to that A, the fifth or back down to that third, the F natural. If I'm thinking about going to that B flat major, keep thinking about that chord shape. I'm on a chord tone, that's the fifth.

Okay, we're going to use the backing track for "Cry For You" to demonstrate this idea of tension and release and again, the chords are just D minor to B flat major essentially. Although, there really is a seventh in the chord and maybe a major seventh I might allude to. But this is going to illustrate the tension and release, so at the beginning of each bar I'll start with a tension note, meaning a non-chord tone. But within that bar I'll resolve it to more of a static chord tone. So here's the track ,let's try it. Within that example I was just improvising , but it brought to light a couple of more things in this regard that I can talk about. Where I started with the melody, that will give you an idea of what that tension and release sounds like. But then I started really developing that same concept over the whole neck and over that D chord. There's that G note, it's a non-chord tone and I bent from that, the A to the C and there's the release, then when it goes to the B flat chord, I bent up to an E, which was the tension note on the D. But it's also a tension note on the B flat because it's a sharp 11, for those keeping track. It's that E natural on the B flat so when released it is a really nice resolution into the third. That's the D natural of the B flat or I could've bent up to the F, because that F is in the chord and if you think about it pentatonically, it is right there releasing to the tonic of the key. But again this happens to be the third, which is a really nice note on that B flat. That note F is a nice chord tone, not to say you need tension and release in every bar. Sometimes I'll start with a nice strong note, if I've had enough tension just prior to that particular segment, I'll decide that I just want to hear over that B flat chord, those are really strong notes. Still just a straight D minor pentatonic over that B flat major is really one of the most pleasing collections of notes, because it's got the fifth, the third, the ninth, and the major seventh. That's my favorite note on the whole chord in addition to the third. I'm hoping that gives you a little insight into that, the technique of tension and release. Again, everything in music is really based on that. So getting your ears tuned into that, and adding that to your repertoire can really help you make some great music. That's my hope for you.
Hybrid Picking
We're going to talk about hybrid picking and initially, when I was asked to do a little section on hybrid picking I thought, well I don't really do much hybrid picking. But, in fact, I do. We're going to use the song "Farmer Sez" from my very first record Ear X-tacy to illustrate some of that. Hybrid picking is using your pick and your fingers. I've got a little country kind of chicken pickin' tone, because that's what I used on the "Farmer Sez" track. A little bit compression on my clean channel and some slap back echo and you got it going on. I'm just going to start with talking about the "Farmer Sez" riff, because that indeed is using pickin' fingers and it's a nice sound. That's all pick but I'm basically using the pick on the lower tonic note. That is almost the bass roll. Basically, "Farmer Sez"is a blues. It's a 3-chord blues in A7. It basically goes around the changes. A7, D7, A7, E7, D7, to A7. All the hybrid stuff, some of the double stops, it's all going to be based on that harmony. The initial riff I'll show you is real slow. There's that seventh and third of the A7. Again, referencing what chord shape it can be related to and I'm kind of pivoting. There's a B and an F#, like a B5. Pulling off of the open D and G string. I hammer on, the E to the F#. So let's start with that a little slower. When I get to the IV chord, the D7 or D9, a little tension and release there. It's super-imposing a C chord over the D. Then releasing it, sliding to the D but just playing the fifth. The D and the A on the G and D strings. Hammering off the lower A string, then pulling off each time. I should've pointed out, I'm using my pick on the low string and then just my third and my middle and fourth finger. You have to figure out what fingers I'm using folks and it's pulling up. But it's a nice tone. You get the flesh and the nail on the string. We're almost there, we've got the I chord. On the IV chord it's back to I. Now the E chord. It goes back down to these two. So there, let me slow that down, that's over the E chord. It's basically just a little lick that outlines the third of that E7. That G# is surrounding it. We'll talk a bit more about chromatic voice leading later, then we're back on the D chord. Starting on a little sixth idea, meaning playing notes that are a sixth apart. You've got F# and a D, which is the root and third of that, of the D7. A common little country lick is to do that sixth and go down chromatically a whole step.

I'll show, from the V chord one more time slowly. I'm on that third and seventh of the D7 chord and that's a fancy ninth chord of a D7. You've got the seventh, ninth, third, and root in the tonic. Let me play the whole thing one more time, in time. Playing it slower you can get a feel for how it flows together. Also take note of how I'm giving some particular emphasis to certain notes, where I'm really pulling up on the string. See how that line has a shape to it. There's some dynamic within. See how that top chord is more accented. So some dynamics within, and that's what's cool about the hybrid picking, it is really the under note that can be a little bit more tucked in. So clearly it can be used for double stops. I've got a backing track set up where I'm going to play the "Farmer Sez" riff slowly for you over that so you can hear it with the groove and then I'll improvise a little bit and I'll use some of this hybrid picking technique. Some of the ideas that came out during that little improvisation after the "Farmer Sez" lick. Giving some emphasis to some of the notes, like that was just bending from the F# to the G and just with my middle finger, giving that note a little bit there's a lot of alternating between the pick. So it can be simultaneous or it can be alternating, which is commonly what I do, it's just the pick and middle finger. So have fun with that. It's just another thing to spice up your playing a little bit. Works with distortion also. Stevie Ray was a great proponent of that when he'd get into some of those bends he'd be underneath that string. So clearly it's not just for country, you can rock out with some of the hybrid picking examples as well.
Double Stops
We're going to talk about double stops, and as the name implies it's actually two notes played at once instead of just a single note or a full chord. I think that some of the earliest ideas I worked on with this, well I guess you can start with Chuck Berry because a lot of the playing he did was that kind of style, it was heavily steeped in double stops, and I'm guessing he probably got that from some piano players. That kind of honky tonk, boogie woogie, double stops. Two notes played at once. And basically, it's harmonizing, a lot of times, it's harmonzing the pentatonic scale. If you play the A pentatonic scale and if you play two notes at once from that scale. So basically I'm starting with just the A and the C. I go down to the G and the B, because I like to get that movement. Then I'm just barring with my first finger on the A and the D string then moving it up. Then it all falls under your familiar pattern. Then third and fourth finger on the A and the D string and then, there's a D and a G string. So it's the same fingering basically and then on the B and the G string you're barring that again and then pinky on the G string, third finger. You're basically just grabbing the note under what you already know. Nice bend on the note isn't it? So this is something I've used a lot, in addition to Chuck Berry and it's also not only good soloing, but it's a great rhythmic device. Say you've got a groove in A minor, it can be a real nice rhythmic device as well. Now let's go back to the key of D minor, since some of our examples have been in D minor and we've been talking about that.

Branching out from the pentatonic we're going to add some other notes and actually play what would be considered the correct mode for that, like the Cry For You progression from D minor to B flat. We've got the minor pentatonic that we know. If we add the other two notes that would make it a complete scale. We've got that ninth through that second, E natural, and then the sixth turns out to be B flat, because of the B flat chord it dictates. There's our scale, so for anybody wanting to delve into the modes it's D aeolian. It's the sixth mode of F major. So a quick word about scales. We're going to talk a lot about different scales and different sections. I don't think it's absolutely necessary to have to learn every scale and every key and every mode. It's handy, but I'd rather you get the basics together first and not get bogged down with too much information where you've got stacks of books with all these different scales. I'd rather build upon what you already know. Expand upon that, so you're making music, instead of getting bogged down with what I call homework. The more you expand your knowledge, the better but don't get bogged down by it. Since I've gotten back into teaching that way these couple years, it's really been awesome for me to get to help people one on one, and I feel over time I'm developing some ability in that regard, but something that I continually encounter is I'll get a student that comes in and maybe they have got stacks of books and they've learned all these scales, but when it comes time to making music they haven't been applying along the way. That's really the delineation I want to make here, is that you need to be using these ideas in musical situations. So starting simpler is always better. Don't bog yourself down with too much homework and information because it's going discourage you, instead of encourage you. So, as I'm pointing out this bit of theory that I'm relating it to aeolian. Some of you may be advanced enough to know what that is and how to employ that, and some of you may not be, but essentially think of it as the minor pentatonic. You're just adding two notes, the ninth and that flat sixth, so imagine connecting a couple extra notes. But the reason I'm pointing out this particular scale is that it's going to help this double stop idea, because I'm going to harmonize that scale. I'm going to start with D and F natural for the D minor. Some of these things I'm doing for the first time myself.

The most simple thing to do initially is just to go horizontally like we talked about before. So if I take this scale, that would be the D minor. That's the way I played it in that pentatonic box, just adding those few notes. But now I'm taking it horizontally, that might be easier for you to see. I'm going to grab the note underneath it that corresponds with that scale, so there's the D minor aeolian scale harmonized in thirds. So you start with F and A, obviously you can do this on every couple of strings. Now you've harmonized the F major, or D aeolian scale all over the neck. There's a backing track I have that will help illuminate this, it's my nod to Pat Metheny's track "Are You Going With Me". It's one of my favorite pieces of music ever recorded and a big influence on my playing. So this is called "Are You Jamming With Me" and it's basically D minor to B flat. It's those two chords and listen now as I play through this, I'm going to play some of the pentatonic that I showed you in an earlier section. I'll demonstrate that briefly and I'll also delve into playing some of the thirds, from that D minor scale. So within that track I started very simply, using that pentatonic that we talked about. Just harmonizing, combining those thirds from the actual minor scale. Now a little bit of the tension and release from earlier, where I grab the fifth of that D and put the ninth on top. Then I release it and get to that fifth, over that B flat. It's that third and major seventh like I talked about earlier. There's another kind of double stop that I just delved into and that's playing the sixth of the scale, where you've got two notes that are a sixth apart. So if we were to harmonize the D minor scale like we did in thirds, we could do it in sixths. We'll start with the D minor. We're just taking those notes from the scale and going up a sixth, whether it's major or minor, depending on the scale degree. If you caught that, I'm actually doing some hybrid picking there as well, by using my pick and finger at the same time to get each note to speak. Used by a lot of old, rhythm guitar styles too, so have fun with the double stops. It's a great way to spice up not only your rhythm playing, but your melodic soloing ideas.

+ 34 more lessons

Start Course

Reviews

25 results

pabsguitars

Verified buyer

01/20/25

Andy is one of the best.

Andy never dissapoint.

Gian B.

Verified buyer

12/24/24

Great course!

MatiSan

Verified buyer

12/09/24

Good course. Andy Timmons presents the techniques used in his songs. One disadvantage of the course is the incomplete lesson transcription.

pab14

Verified buyer

12/14/23

Fun & Powerful

Nice course. Easy to follow along with.

jlglezarmenta

Verified buyer

10/15/22

Highly recommended

I really like this course, Andy Timmons is a great musician and in this course he explains the concepts used to play his songs, and it makes it easier to understand how to play the solos and improvise using his teaching. 100% recommended.

Stop searching. Start improving with All Access.

Try 14 days free. Cancel any time.